The last time I made this pie was maybe 6 years ago and I feel like it was only marginally less dramatic this time. Why I choose to bake pies in Mumbai’s sweltering October heat is anyone’s guess, but at least this time, I didn’t need my husband and sister to help me roll out pie crust. Growth!!
This super lemony, bright and sunshine-y pie is actually easy to make if you don’t have my tendencies towards drama. With new photos and a slightly tweaked recipe, I’m so happy about this one. Let’s make pie!
Many lemon pie recipes use just egg yolks, some use yolks and whites, some add condensed milk, some add heavy cream. There are so many versions I decided to just stick with the Martha Stewart recipe I made the first time around. The one thing I recommend though is the pie crust from this molasses tart because I found with slightly more flour, it was easier to handle and roll, particularly in warm weather (but I do have some additional tips in the recipe below about the rolling of the pie crust and transferring it to the dish).
While I used sour cream as recommended this time, I’ve also used yoghurt, either works. I added a small amount of cream this time for some extra flavour and richness and as always, I added vanilla because with four eggs, an eggy flavour is possible despite the copious amounts of lemons that go into this recipe.
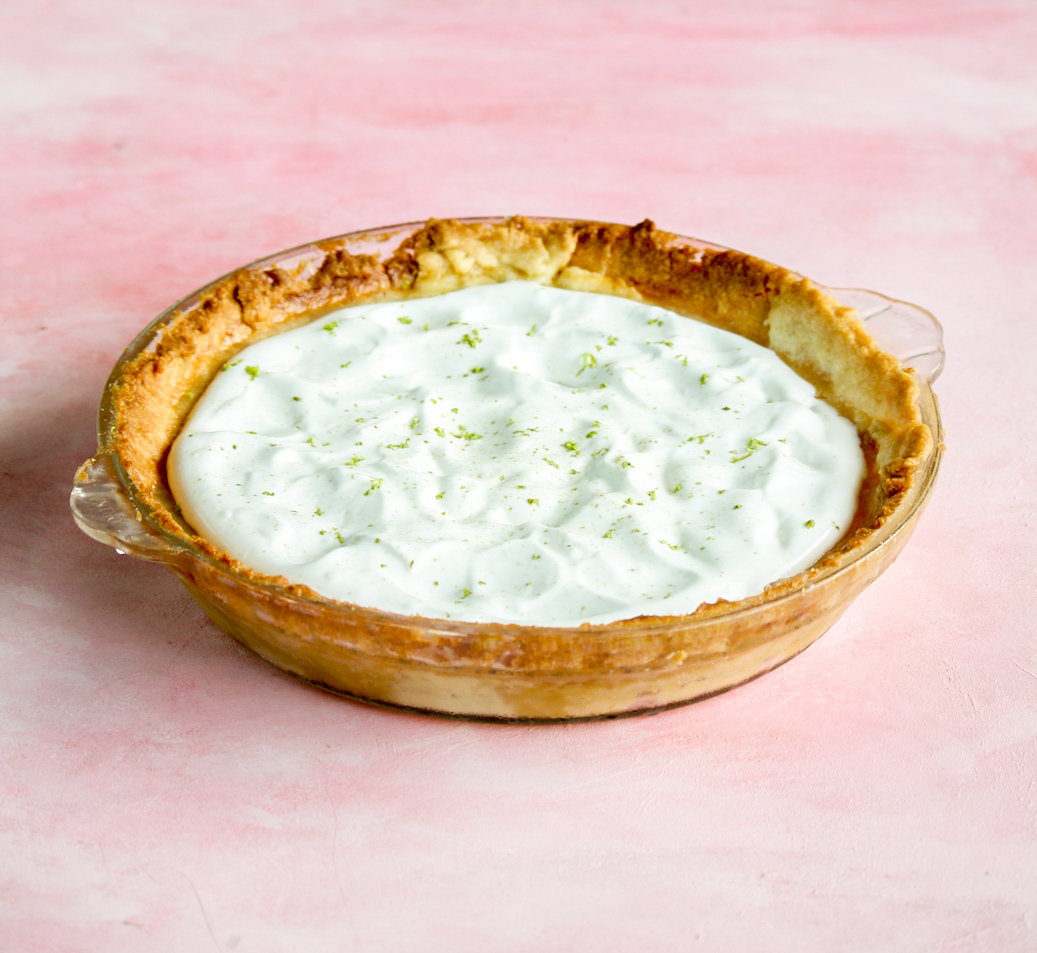
Technically you don’t need the whipped cream topping but it mellows the citrusy flavour and adds an extra layer of fun, so I do recommend it. The filling itself bakes up soft and creamy and goes beautifully with the crisp, flaky, buttery crust. It’s important not to over-bake this pie because the eggs, if overcooked will cause the surface to crack. I’ll be honest, I didn’t trust the wobby center and I did overcook it, so don’t make the same mistake I did. And if it still cracks, well, that’s what the whipped cream is for!
Lots of tips and tricks in the recipe below. I hope you’ll try this!
Please read the recipe notes before beginning.

Lemon Pie
Ingredients
For the pie crust
- 1 and 1/2 cups all-purpose flour (180 gms)
- 2 tbsps caster sugar
- 1/4 tsp salt, skip if using salted butter
- 115 gms unsalted butter, cold and cubed (1/2 cup)
- 2 to 4 tbsps ice cold water
For the filling
- 1/2 cup lemon juice (125 ml)
- 4 eggs, at room temperature (see notes)
- 1 cup caster sugar (190 gms)
- 1 and 1/2 tsps vanilla extract
- 1/2 cup sour cream (150 gms), at room temperature (see notes)
- 2 tbsps cream (optional, for a little extra richness)
- 1/4 tsp salt
For the topping
- 1/3 cup whipping cream (70 ml, I used Amul)
- 1/4 cup caster sugar (45 gms)
- 1/4 tsp vanilla extract
Instructions
- Make the pie crust. In a mixing bowl, stir the flour and salt together, then add the cubed butter. Rub the butter into the flour with your fingertips until the mixture resembles coarse breadcrumbs and there are pea-sized bits of butter scattered through it.
- Slowly add the ice water one tablespoon at a time until the flour is moistened and the mixture clumps together when you press it between your fingers. You may not need all four tablespoons, especially if working in a warm environment. Use your hands to gently bring it together in a soft dough. Place the dough on a large piece of clingfilm, flatten into a disc, wrap tightly and refrigerate for two hours, or overnight.
- Remove the chilled dough from the fridge, unwrap and place on a floured silicone mat. (You can also do this on a floured kitchen counter, but I prefer the mat to prevent sticking. Depending on how long you chilled the dough, you might need to let it sit at room temperature for about 10 minutes.)
- Lightly flour the top of the dough and roll out into a 12-inch circle turning the mat as needed to make sure the dough is even. I like to do this with clingfilm on top of the dough because I find that in warmer temperatures, this prevents the butter from melting onto the rolling pin and making the dough messy.
- Transfer the rolled out dough back to the fridge for 10 minutes, keeping the top covered with clingfilm. (This is also where the silicone mat comes in handy, you can easily slide it onto a tray with the dough and place it in the fridge.)
- Grease a 9 inch pie dish and keep it ready. To place the rolled out dough in the dish, fold it in half and then half again to make a into a quarter shape and unfold it in the center of the dish. Alternately, gently flip the silicone mat directly over the dish, peel it off slowly and gently press the dough into the dish and onto the sides. Trim the edges and use the scraps to patch up any bits that may have broken. If you find it hard to transfer the dough, place it in the freezer first for about 10 minutes before this step. I found this very helpful on the super hot day I made this pie.
- Transfer the pie dish to the fridge for 30 minutes. Preheat the oven to 200 C. Bake the crust for 20 to 25 minutes until lightly browned. It doesn't puff up much in my experience but if you want to blind-bake it, see the notes below.
- Set aside to cool while you make the filling. Reduce the oven temperature to 175 C.
- To make the filling, first squeeze the juice out of the lemons (use a measuring cup to make sure you have 3/4th cup of it, from roughly 8 to 10 regular Indian lemons). Then in a mixing bowl, add the eggs, sugar and vanilla extract, whisking well to combine.
- Now add the salt, sour cream and the cream and whisk again to combine (a balloon whisk is great, or you can use a hand mixer on low speed). Gradually add the lemon juice, whisking continuously till you have a smooth, runny mixture.
- Pour into the cooled crust. Bake for 25 to 30 minutes until the edges are set (small cracks may appear) but the center is still wobbly. Over-baking the pie will cause it to crack (I made this mistake, so you shouldn't!). It will continue to cook and set as it cools. If you feel the edges of the crust are browning too fast during the baking time, cover the pie dish very loosely with foil.
- Let the pie cool in the oven itself with the door slightly open, for about 20 minutes. Then let it cool completely at room temperature and finally, place the pie in the fridge for at least 6 hours or ideally, overnight. If you do see cracks in the filling as the pie cools, don't worry, the whipped cream covers it all!
- To make the topping, beat the whipping cream, sugar and vanilla together on high speed until stiff peaks form when you lift the beaters. Spread in an even layer over the pie and decorate with extra lemon zest if desired. Place back in the fridge for 1 hour so that the whipped cream firms up a little and the pie is easier to slice.
- Use a sharp knife to slice straight through the topping, filling and crust (loosen the sides if needed with the edge of the knife because despite greasing the crust might stick to the pan.) Use a metal spatula to help slide the pieces out of the pie dish. Dig in! The filling is smooth and creamy and on the softer side but it will hold its shape if the pie has been chilled enough.
- Store the pie in the fridge for 5 to 6 days. The whipped cream topping will deflate a little bit though so my advice would be to either whip it and store it separately (for 2 to 3 days in the fridge) and serve over individual slices, or simply whip it fresh whenever you want to eat the pie. Happy baking!
Notes
Shop this recipe!
This post contains affiliate links.











Pingback: Lemon Pie » Kanole
Pingback: Christmas Mince Pies
Pingback: Peach and Cherry Galette
Pingback: Spinach + Mushroom and Mushroom + Olive Quesadillas | The Desserted Girl
Pingback: Whole Wheat Chocolate Chip Skillet Cookie | The Desserted Girl
Yummy! This pie looks delicious! Loved the story 🙂
Thank you!