I’ll be honest. For a long time, banoffee pies didn’t make much sense to me because the very few times that I’ve actually eaten one, it seemed to be either mostly whipped cream or mostly cloying sweetness. I didn’t get the point at all and figured the only way to have it my way, was to make it myself. I’m so glad I did! Because it turns out, with homemade pie-crust, a restrained amount of homemade caramel, fresh bananas and a dollop of freshly whipped cream, a banoffee pie can actually be pretty spectacular. Also, making them in smaller, individual portions means you don’t worry too much about leftovers, or how to avoid eating an entire pie yourself. Plus, they’re cute. Win win!
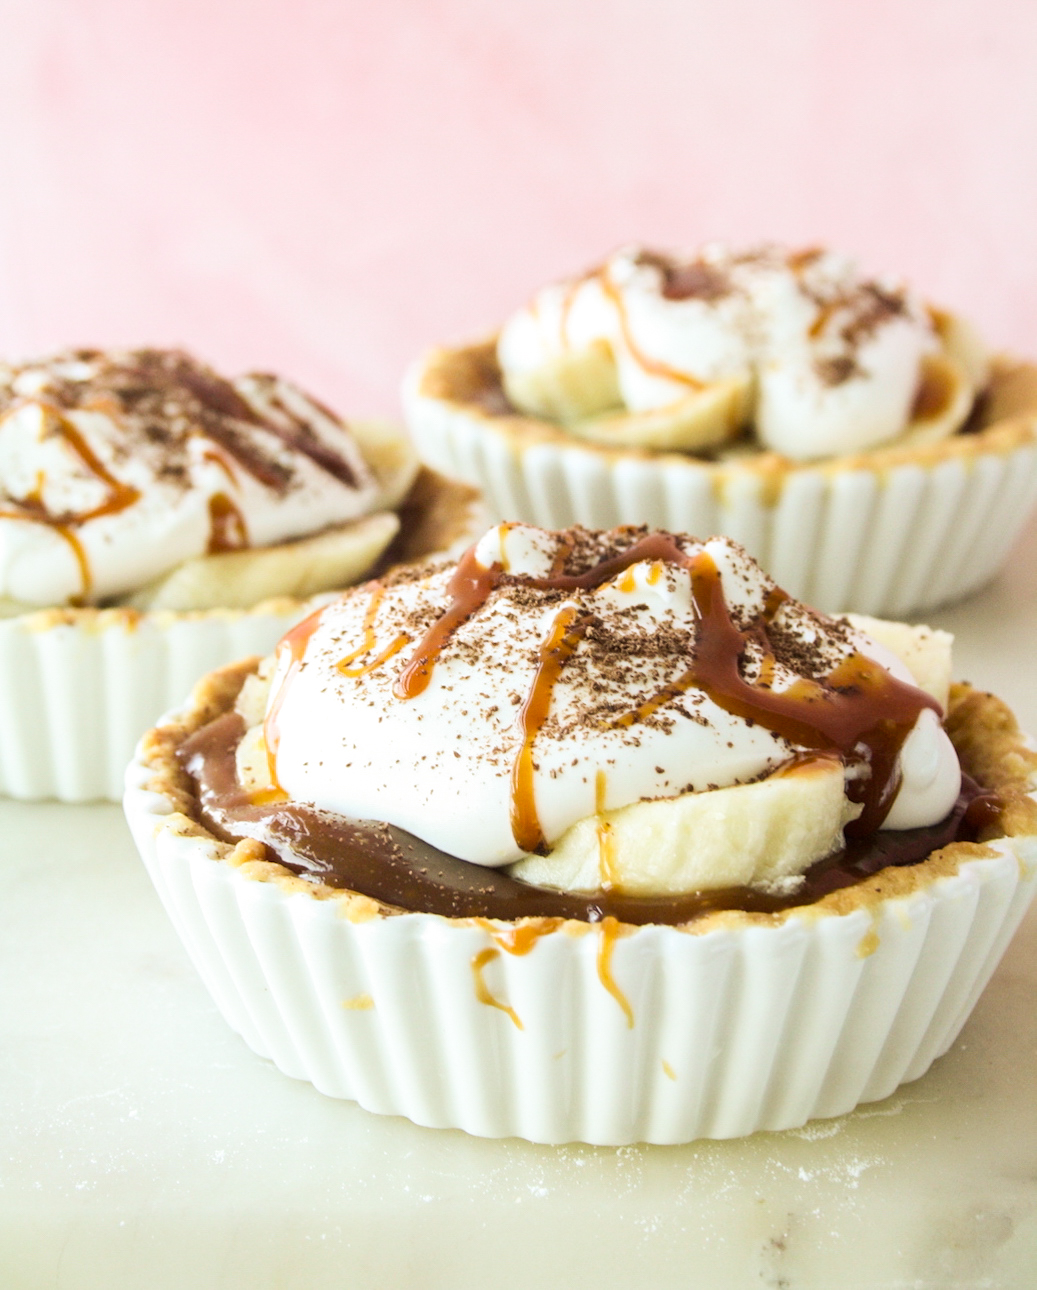 Banoffee comes from banana + toffee, and the toffee is usually ‘dulce de leche‘, often made at home by boiling a can of condensed milk for hours till it takes on a thick, caramelised, sticky consistency. It’s also available readymade. However, making it at home scared me, because I have very clear visions of hot condensed milk exploding everywhere. Braver people than me have done it, so I’m sure it’s not impossible. But the main reason I chose to go a simpler caramel route was I love homemade caramel and it can be made in smaller quantities, and lightly salted to counter the sweetness. Plus, so much easier.
Homemade caramel is thinner than dulce de leche, but as it rests, it thickens and if you chill it, it thickens even more. So it’s perfectly spreadable and tastes divine. I’m also a big fan of making pie crust at home, and this one is buttery, flaky and goes so well with all of the soft whipped cream.
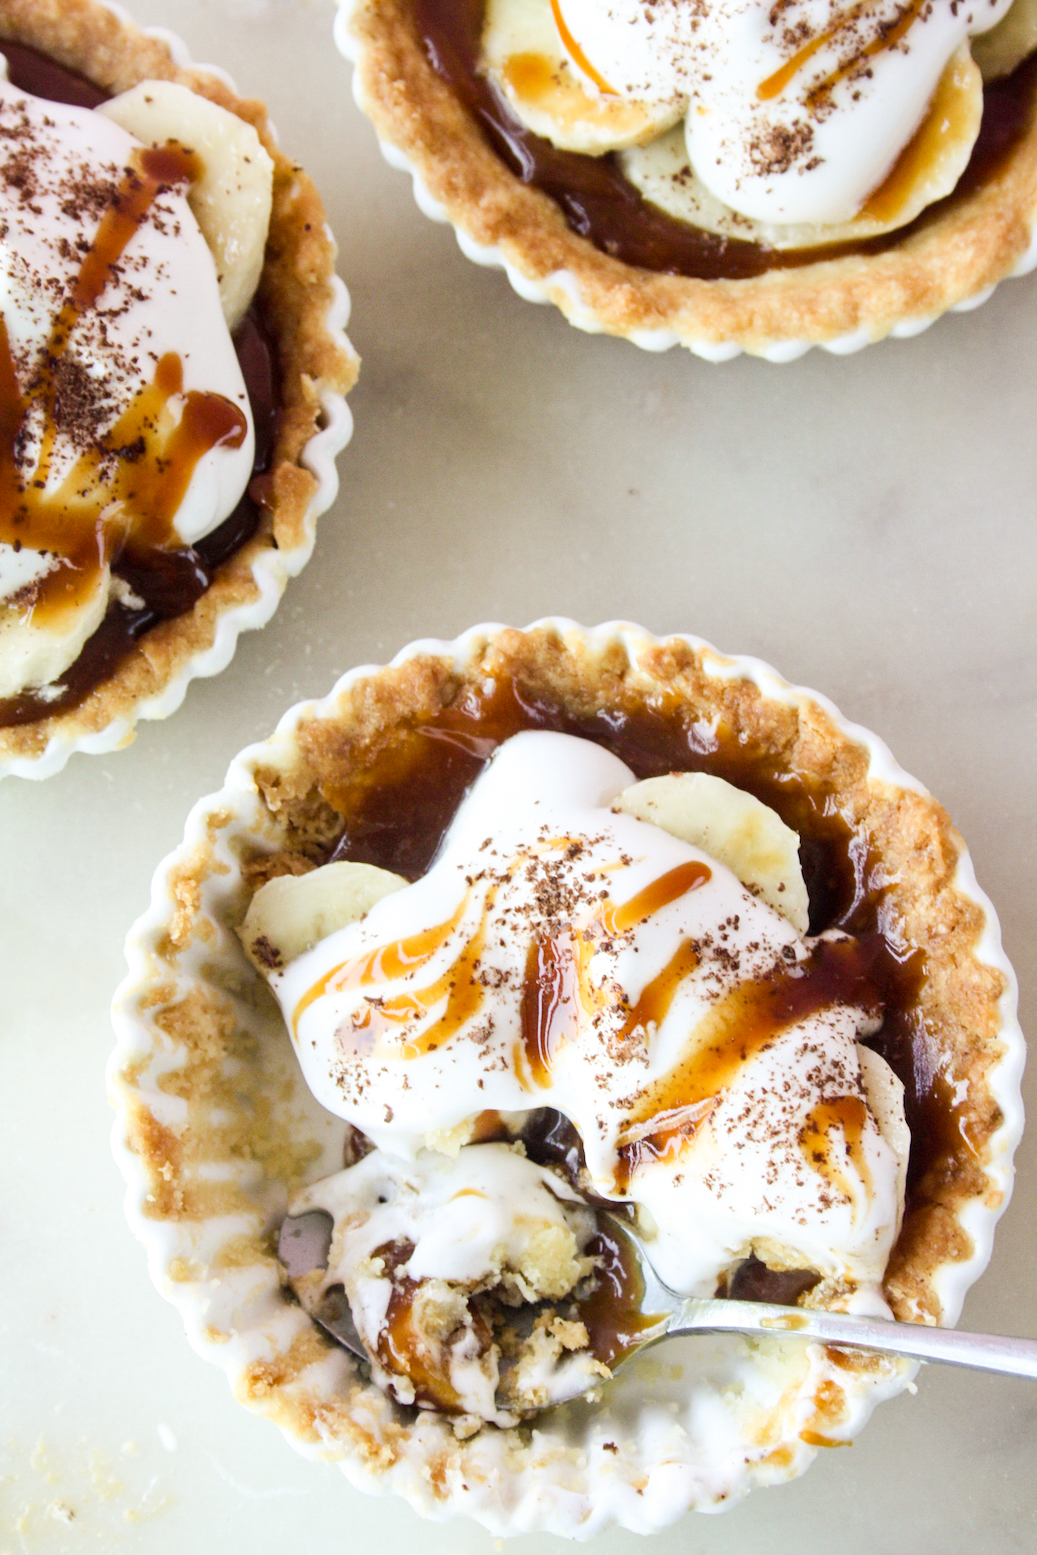
Because banoffee pie has fresh bananas and cream, it usually doesn’t last very long and tastes best within the first day or two. That’s the other reason I loved making these as a smaller batch. The pie dishes I used are small ceramic ones, so they make the perfect little individual portions to dig a spoon into. You can of course, grease them or use non-stick ones if you prefer to un-mould the crusts before filling them.
So, to recap: a crisp crust, sticky caramel, fresh bananas aaaand billowy whipped cream. There’s lots of texture and flavour without being overwhelmingly sweet and I love that! Let’s make pie 🙂
Mini Banoffee Pies
Ingredients
For the pie crust
- 1/2 cup plus 2 tbsps all-purpose flour (80 gms), plus more for sprinkling
- 1 and 1/2 tbsps caster sugar
- 1/4 tsp salt, if using unsalted butter
- 1/4 cup cold butter, cubed (55 gms)
- 1/2 tbsp ice water
For the caramel
- 1/2 cup caster sugar (95 gms)
- 45 gms butter, at room temp
- 1/4 cup cream, at room temp (60 ml, regular or whipping cream)
- 1/4 tsp salt, if using unsalted butter
For assembly
- 1/4 cup cold whipping cream (60 ml)
- 2 tsps icing sugar
- A couple drops of vanilla extract
- 1 banana, peeled and thinly sliced (ripe but not soft)
- 2 tbsps grated dark chocolate, optional
Instructions
- To make the pie crust, combine the flour, sugar and salt, if using, in a large bowl.
- Using your fingertips, rub the cold butter cubes into the flour till the mixture resembles coarse breadcrumbs with a few larger bits of butter scattered through. These bits are what create a flaky dough.
- Add 1/2 tbsp of ice water and bring the dough together. You are looking for a soft, but not excessively wet dough. Add a few more drops of water only if needed.
- Form the dough into a rough ball. Place it on a large piece of clingfilm and pat into a 3/4th inch thick disc. Wrap tightly and refrigerate for 2 hours. This dough can be chilled or frozen longer, as long as its thawed at room temperature for about 15 mins before rolling.
- Lightly grease three 4-inch pie dishes (see notes). Unwrap the dough and let it sit at room temperature for a few minutes. I like using a lightly floured silicone mat to roll out the dough. It prevents stickiness in the summer and makes it easier to transfer the dough to the fridge if it warms up.
- Sprinkle on a little flour and roll out the dough into a roughly 10" circle. There's no need to be too precise, just make sure the dough isn't too thin that it tears, or too thick to press into the pie dish. Using a bowl that is about an inch wider than your pie dishes, cut out three circles from it. You may need to re-roll the scraps to cut out a third circle.
- Lift each circle of dough (chill the cut-out dough in the fridge first if you aren't able to lift it off the mat immediately) and place it in the pie dishes, pressing them up against the sides and trimming the edges. Any torn or thin bits can be patched up with small bits of the dough.
- Chill the prepared dishes for 10 minutes and preheat the oven to 180 C.
- Prick the base of each pie crust with a fork a few times to prevent it from puffing up in the oven. Bake for 20 minutes or until golden brown and crispy on the edges. Set aside to cool completely.
- In the mean time, make the caramel (I started this while the pie dough was chilling so that the caramel gets plenty of time to cool and thicken) On low heat, melt the sugar, stirring constantly with a spatula or wooden spoon. Watch the sugar like a hawk. It will begin to form lumps and look gritty after about a minute. Slowly you'll see it melting down, going from a clear liquid to amber pretty quick. Stir till it melts down completely.
- Add the butter and watch your hands because the mixture will splutter and bubble up quite a bit. Stir again till the butter melts into the sugar.
- Now slowly pour in the cream and watch out for more spluttering and bubbling.
- Once the cream has blended in, allow the sauce to boil for 30 seconds. It will rise and froth some more.
- Turn off the heat and stir in the salt. Pour into heat resistant jars once it has cooled for about 10 minutes. Let cool completely at room temperature for about 30 minutes, then in the fridge for 1 hour. If you find it too thick to spread onto the pies, let it sit at room temperature again while assembling.
- Finally, whip the cream, vanilla and sugar either by hand or with a hand mixer, till the cream forms stiff peaks and is super thick. Keep chilled in the fridge.
- Assemble the pies! Divide the caramel equally among the three pies, spreading it out evenly. Then top with 4 to 5 slices of banana, and then a dollop of whipped cream. You can be as generous as you like! Sprinkle with grated dark chocolate and tada, all done. Keep chilled in the fridge at all times if not eating immediately. They taste best up to day two, after which the bananas will go a little mushy so it's best not to let it get there. Happy banoffee-ing!
Notes
Shop this recipe!
Check out a full list of my baking essentials here!
This post contains affiliate links.










Hi! What Indian brand of whipping cream would you recommend? Anything easily available …
Hi, I use Amul whipping cream and i usually get it on big basket, you can see more here https://thedessertedgirl.com/baking-ingredients-in-mumbai/
Really good and easy recipe. I had enough caramel sauce for four mini pies, perhaps because I went light on the sauce and heavier on the bananas, so I made one more pie crust.
Oh these pies look amazing!! Excellent recipe Gayatri 🙂 So happy to have subscribed to your blog.
Thank you Sheenam!