Homemade. Cream. Rolls. This is not a drill!
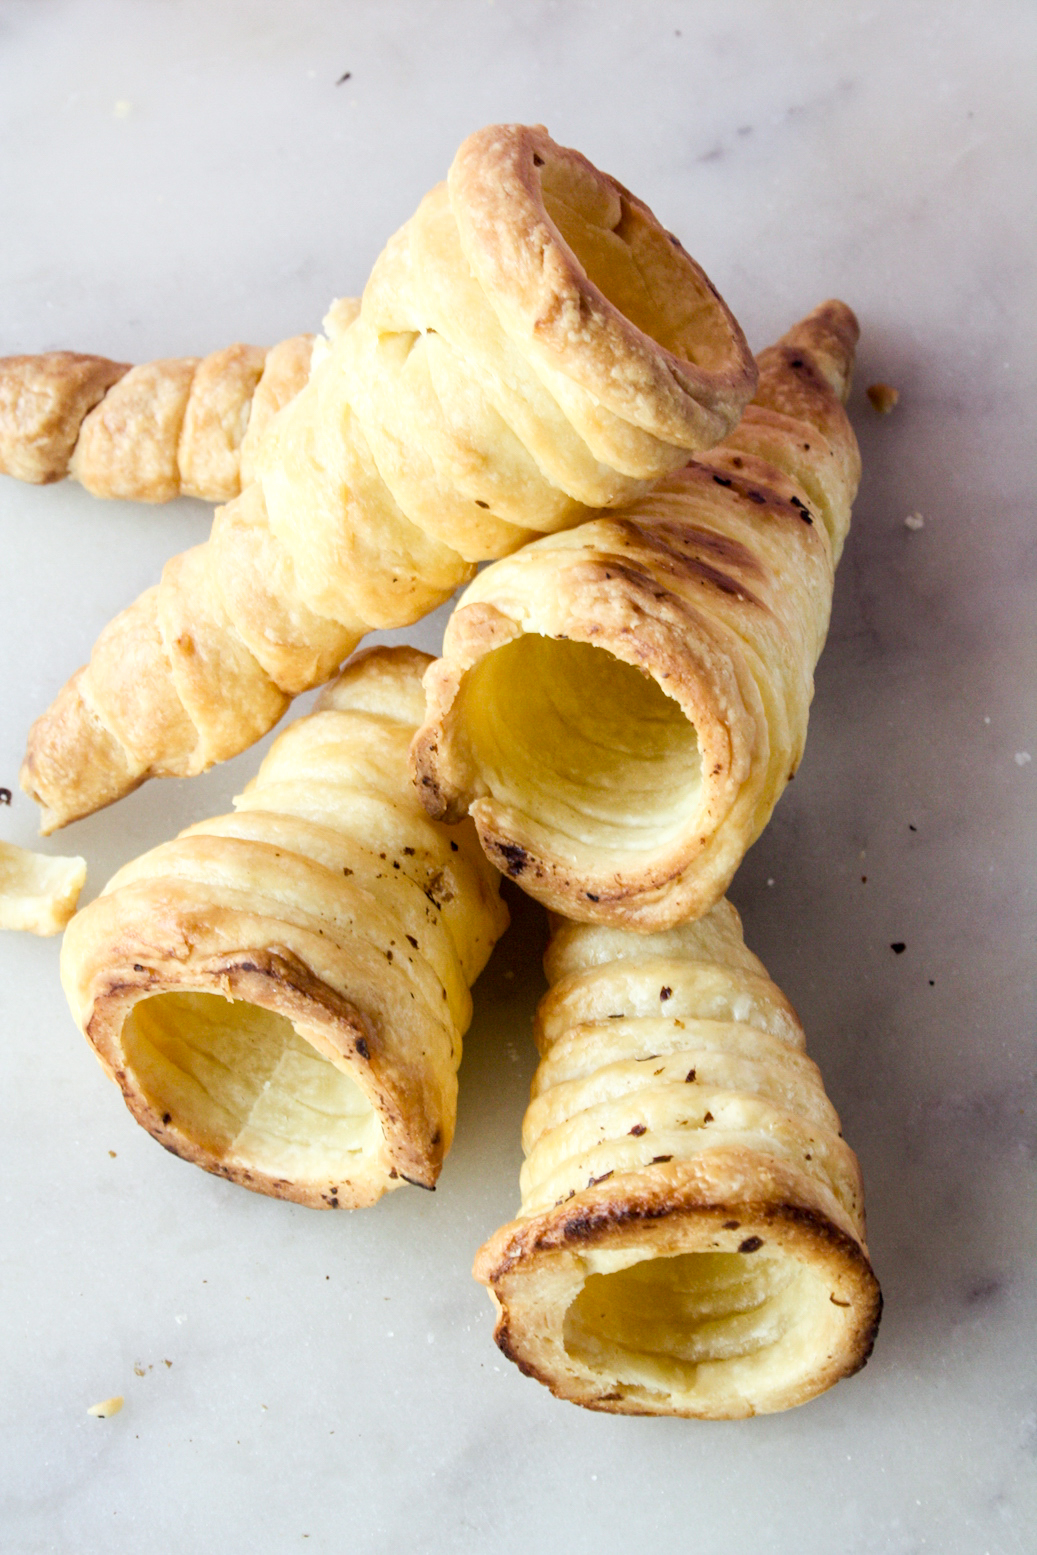
If you grew up in India, chances are you’ve eaten a cream roll at least once, and much more than that if you spent holidays in the hills, where for some reason, they’re super popular. They are conical rolls of flaky dough that is like a cross between pie crust and puff pastry, and they’re filled with sweetened cream. Sounds basic but noooooo, anything but. Cream rolls are the most perfect sweet-salty combination and have tons of texture from the crusty outside to the cream-softened inside. Today, the versions you see at bakeries and small shops are a bit too greasy for my liking and they usually use vegetable fat. But because the flavours of an all-butter dough, and freshly whipped cream are unbeatable, this homemade version trumps any other! So thankful to my husband for asking if these can be made at home, because seriously, I’d forgotten how much I loved them. They’re a labour of love, yes, but worth every bit of it!
 There aren’t too many recipes for cream rolls out there. In the few that I came across, store-bought puff pastry seemed to be common, but from what I remember, the outside of the roll wasn’t quite as delicate as just puff pastry. It was firmer, but super flaky. Then I came across this Dessert For Two recipe for homemade puff pastry. It looked to me like pie crust, with more butter and water and something told me it would work really well here. I added sugar to the dough and found I also needed to use more flour, because the dough was stickier than I expected. However, as it chills, it becomes easier to work with.
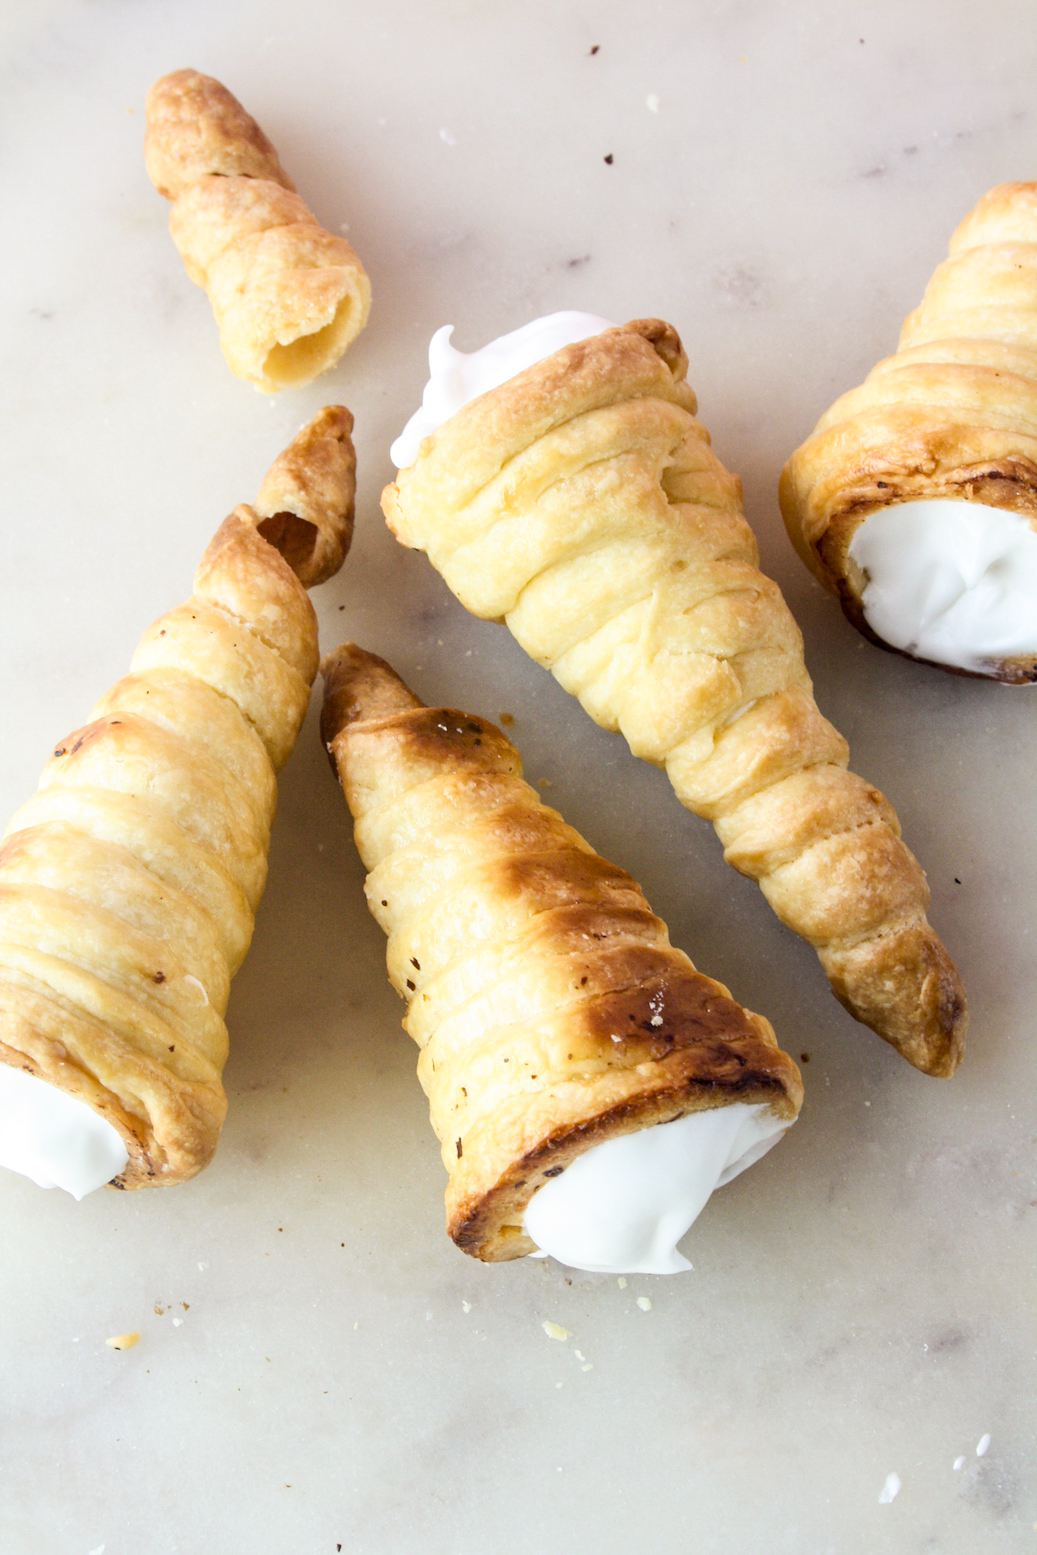
At one point, making puff pastry at home terrified me. I now know that there was really no reason to think it wasn’t possible. All it involves is rolling and folding the dough a few times and as long as you keep chilling it and use plenty of flour to prevent stickiness, it’s extremely doable. This was definitely a little ambitious to do in Mumbai’s humidity, but it’s absoluuuutely possible. The slightly cumbersome part is wrapping the individual strips of dough around the steel cones (more on those below), making sure that they overlap and stick well, so that they don’t separate in the oven. In the heat, this is definitely an annoying step because the dough softens rapidly. Again, if you keep chilling the dough, it’s not too bad!
You land up with a beautifully puffed, many-layered, buttery and super flaky pastry. My favourite bit is to break the cone apart as I eat, so the individual segments turn into bite-sized, cream filled delights.
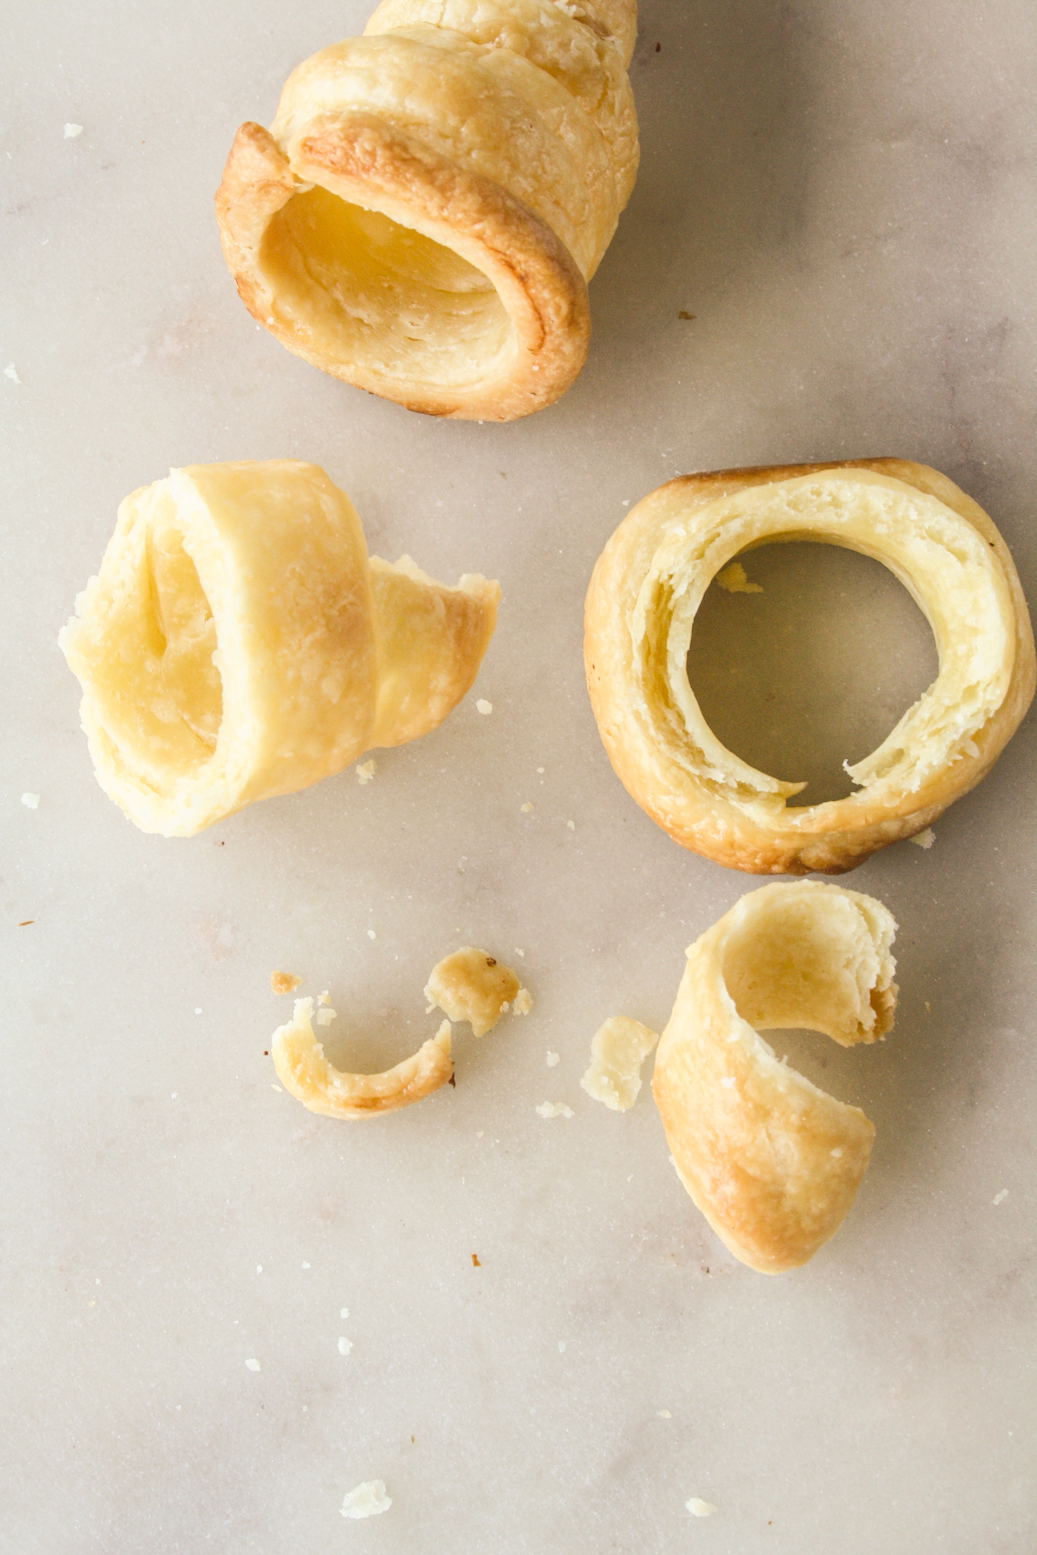
To fill them, I just sweetened the cream with some sugar and added vanilla for flavour, but that’s it. You can flavour it with an extract you like, or even fresh orange zest but I decided to leave it classic. While the rolls are at their crispest when freshly filled, they soften just enough by the next day to give you some textural fun. Crisp and firm on the outside and melt-in-your-mouth buttery on the inside.

The recipe is detailed so I hope you’ll try these at home! I’ve included tips on the best way to shape and bake the rolls as well. In-process pictures below the recipe! Let me know how it goes 🙂
Please read the recipe notes before beginning.

Cream Rolls
Ingredients
For the puff pastry
- 1 cup + 2 tbsps all-purpose flour (140 gms plus more for sprinkling as needed)
- 1/2 tsp salt
- 2 tbsps caster sugar
- 140 gms unsalted butter, cold and cubed
- 1/4 cup ice water (60 ml)
- 1 tbsp cream + 1 tsp water
For the filling
- 1/2 cup chilled whipping cream (125 ml, see notes)
- 3 tbsps icing sugar
- 1/4 tsp vanilla extract
Instructions
- In a mixing bowl, combine the flour, salt and sugar. Stir, then add the cubed butter. Rub the butter into the flour with your fingertips until there are still pea-sized bits of butter throughout the dough.
- Pour in the ice water and bring the dough together with a silicone spatula. It will be quite soft. Don't overwork it, just form it into a rough mass, and place it on a silicone baking mat. Shape into a disc that's about an inch high, then cover the mat loosely with clingfilm and chill for 1 hour.
- Uncover the dough, lightly sprinkle the top with flour, then place the sheet of clingfilm back on top. Roll the dough over it unto a roughly 10x6 rectangle, but precision isn't important. It's more important to make sure you're rolling it out evenly. In warm kitchens, I find the clingfilm helpful to prevent any butter or flour from sticking to the rolling pin.
- Remove the clingfilm and now fold the bottom half of the dough to the center, and fold the top half over it, like a letter. (see photos below and if the dough is difficult to fold, chill it for 10 mins). If you're doing this on a silicone mat, just lift the edges of the mat itself to help with the folding. Chill the folded dough for 10 minutes.
- Now rotate the dough ninety degrees (or just rotate the mat), and roll out again into a roughly 10x6 rectangle. Fold again, rotate and roll. Repeat this fold-rotate-roll routine 6 to 8 times at least. This is where you're ensuring the puff pastry has multiple flaky layers. As you work, you'll find the dough becoming more pliable and less sticky with every fold. Keep chilling the dough as needed, by sliding the mat onto a baking tray and placing it in the fridge every time the dough warms up. Keep sprinkling flour as needed during this process, I used about 4 tablespoons.
- When your final roll is done, fold the dough up again the same way, cover with clingfilm and chill for at least two hours.
- Now cut the dough in two, leaving one half in the fridge. Leave the other portion on the mat itself and roll out (with a sheet of clingfilm on top) into a rectangle that's roughly 8x6 inch sized. Again, precision is not necessary. You just need to be able to cut fairly long and thin strips to wrap around the cones.
- Trim the edges of the rectangle to even them out, then slice it into 1/2 inch wide strips. If the dough feels warm, place the mat in the fridge again.
- Lightly oil the outsides of your steel cones (5 to 6 inches long; see notes). Starting with the tip, wrap the strips of the dough around the cone, making sure they overlap a bit and stick to each other well, otherwise they'll separate in the oven. In particular, make sure the tip is well covered with dough. Depending on how many cones you have, you can either prep them all at once, or do them in batches. I had a set of 3 cones and made 9 rolls, so this took a while but once you get the hang of it, it moves quickly.
- Place the cones with the tip pointing upwards on another silicone mat. Slide onto a tray and place in the fridge. The cones have to be cold before you bake them, so that the end result is nice and flaky from the steam that rises from the cold butter.
- Preheat the oven to 180 C. Mix the cream and water in a small bowl.
- Brush each cone very well with the cream, to get a nice colour and shine.
- Bake for 20 to 25 minutes (with the cones placed vertically, tip facing upwards) until golden-brown on the outside. If you see that the individual strips of dough seem to be separating, don't worry. Just gently lay the cone down horizontally and continue baking.
- Once they're done, let them cool for 5 minutes, then gently slide them out of the cones, moving from the broad to narrow end. If any strips have separated, press them together while you remove the cones from the moulds. It helps them keep their shape.
- Repeat with the remaining strips and the second half of the dough. The hard part is done!
- Once the cones have completely cooled, whip the cream, sugar and vanilla with a hand mixer or in a stand mixer, until thick, fluffy and you see stiff peaks forming when you lift the beaters. Fill each cone with the cream and store leftover cream in the fridge for 3 to 4 days.
- Eat immediately! Filled rolls will keep in the fridge in an airtight container for 3 to 4 days, although the texture is best on day one and two. The cones can be made 2 to 3 days ahead and filled as needed as well. Make sure they're always in the fridge to prevent them from going soft in the humidity. Happy cream roll-making!
Notes
Shop this recipe!
Check out a full list of my baking essentials here!
This post contains affiliate links.
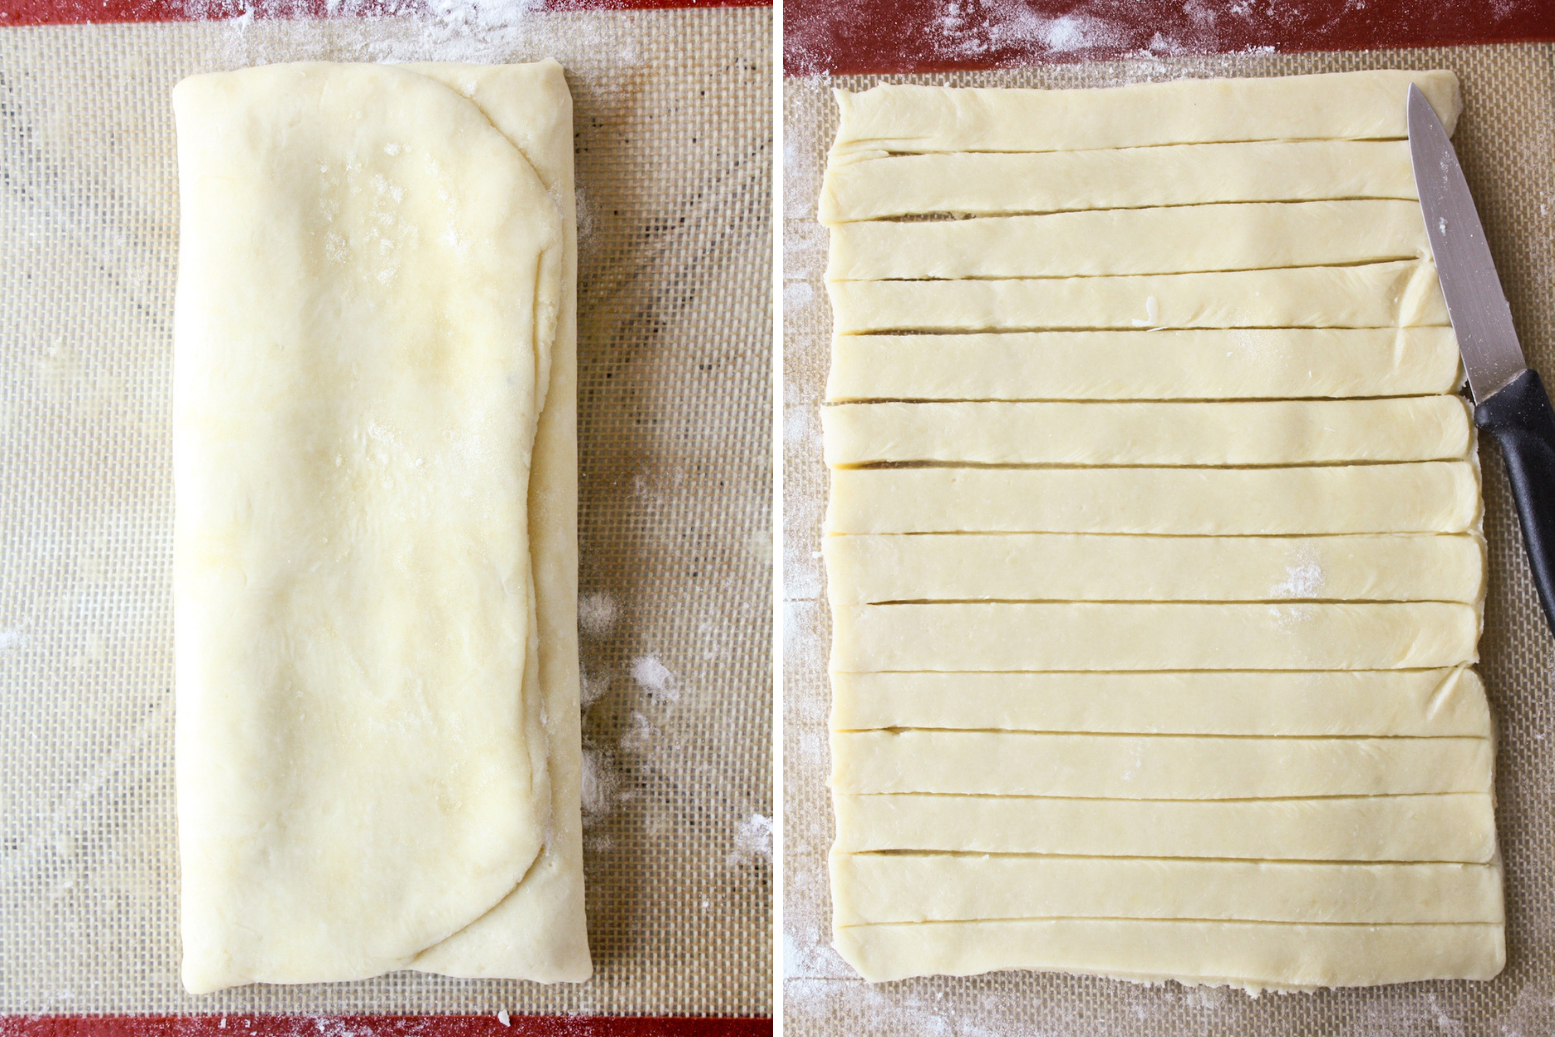
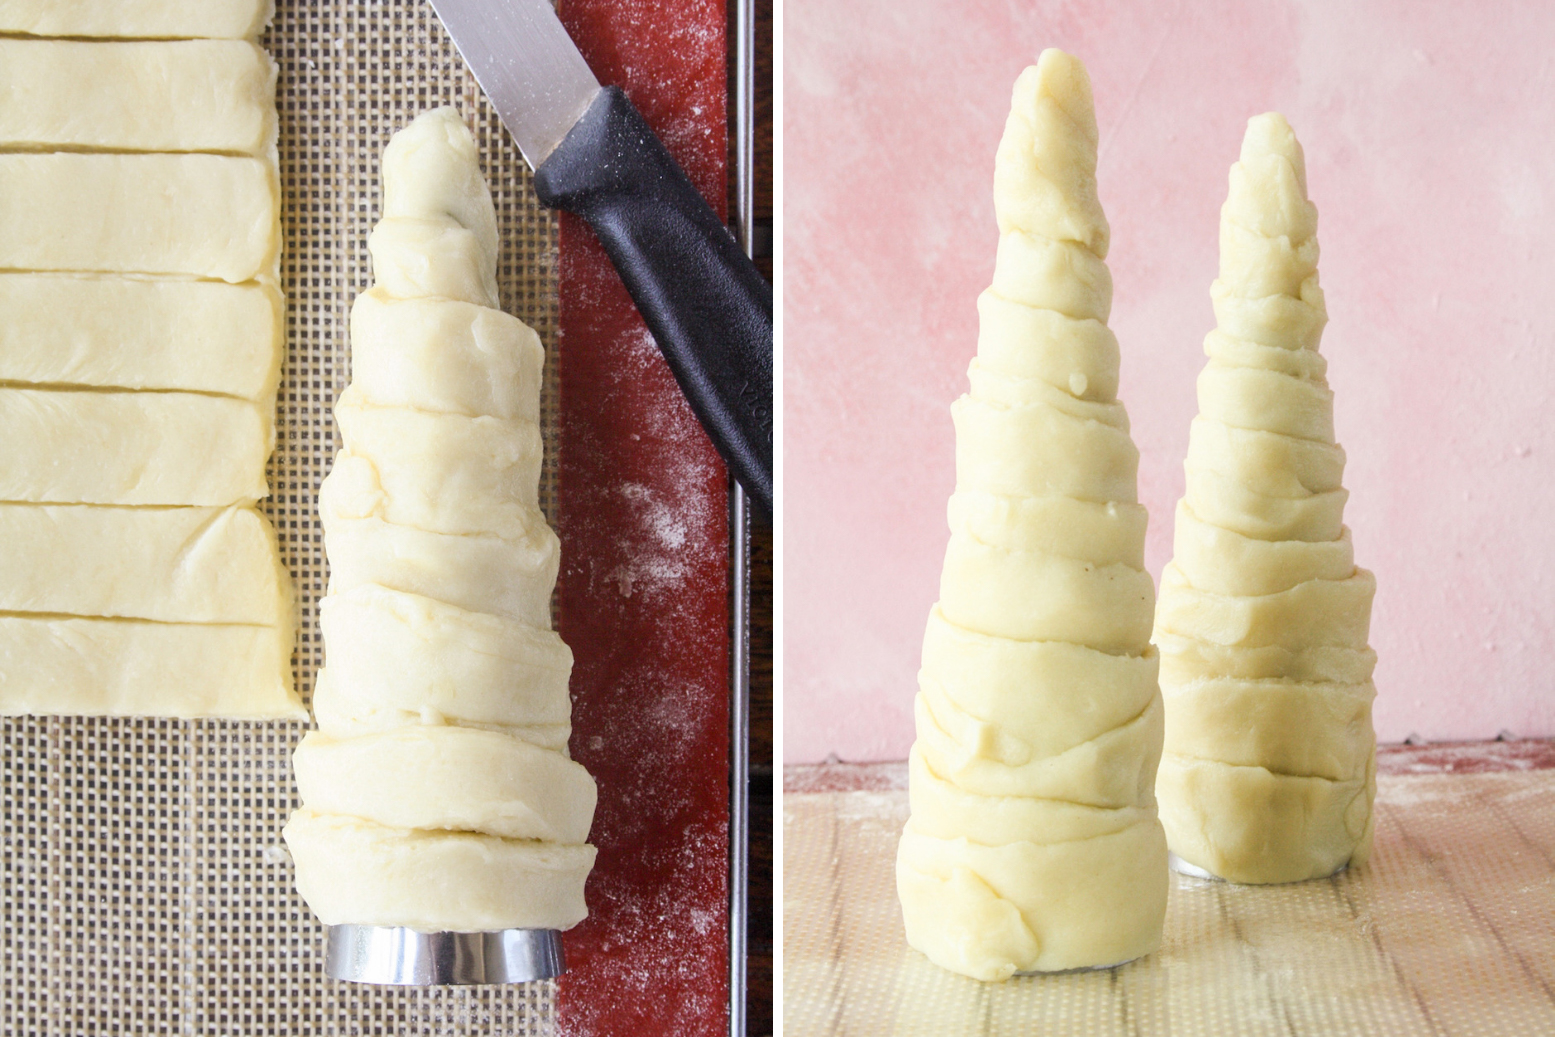







Pingback: Cream Roll Recipe - CookCrews.com
Pingback: Cream Roll Recipe - Cream Rolls - The Desserted Girl
Pingback: Top 10 recipes of 2020!
Pingback: Childhood Memories | Lips Smacking food during the '90s - Youthwheel
My cream rolls are remaning unbaked from inside any solution?
You could bake them for a few minutes more, but if the outside is already browned then there’s a chance they may burn so keep a close watch on them
Yes that happened any other way to bake the inisde?
If the outside is browned then they are unlikely to be uncooked , they will firm up as they cool
Unbelievable. You made cream rolls! You really are dedicated to the craft. And they look great.
Thank you! That means a lot 🙂 It was fun to challenge myself to make these. Let me know if you try them 🙂