Happy Monday! I’m so excited about this cake because it’s my first official mango recipe this season and it’s a gooooood one. It’s also my first ever roll cake (or Swiss roll, whatever you know it as) and I can’t believe it turned out so well, without any catastrophes.
What it basically is, is this. A lighter-than-air sponge cake made without oil or butter, and super fluffy, is rolled up with a classic filling of mangoes and fresh cream. Covered in icing sugar and chilled, then sliced to reveal the cutest little pieces of cake you’ve ever seen. Let’s do this!
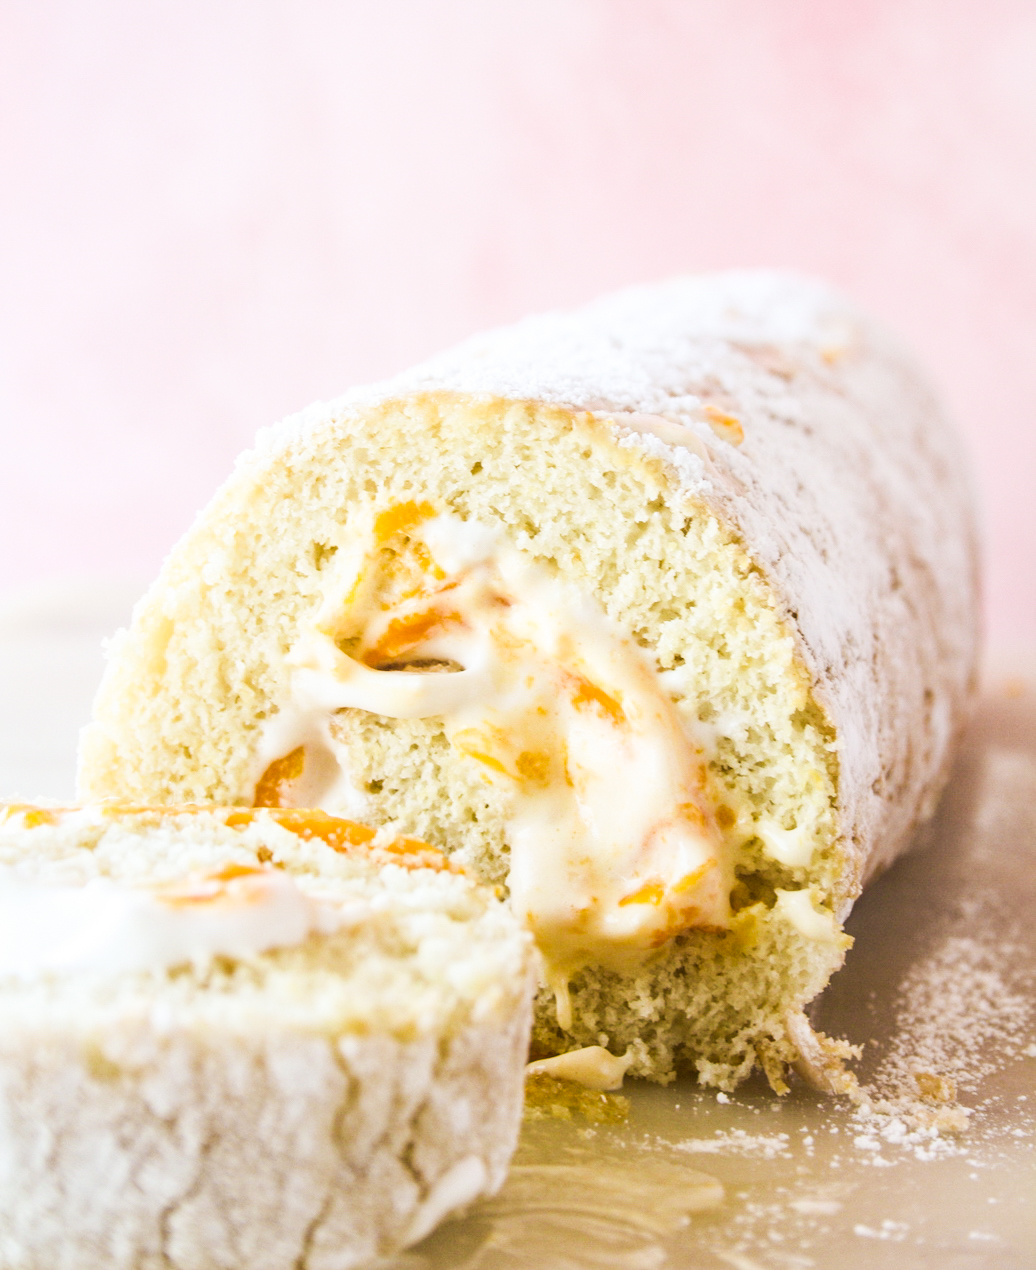 A roll cake has been on my mind for ages but I was always intimidated by it. You bake a cake and that turn into a cylindrical shape? Seriously…? What if it breaks, what if it cracks, what if I burn my hands? So many questions. The biggest one of all was how to make it in a standard cake tin, without having to use a fancy one bought just for that purpose. I then came across a beautifully explained recipe with lots of photos, by Sally’s Baking Addiction and the great idea by DessertForTwo to make this as a small roll cake in a normal square pan.

So, I halved the original recipe so that it would fit in my square pan (the same as the one I use for brownies and this cake!) and produce a thin, very easily rollable sponge. Most roll cakes use cake flour which contains cornflour for extra softness. I just went with all-purpose flour and the result was amazing, so no regrets. I also decided to go with a simple filling, and in this season, there’s nothing more delicious than chilled mangoes with freshly whipped cream!

This cake depends on super airy, highly whipped egg whites to help it rise. It gets a little help from baking powder, but many recipes for a traditional sponge cake don’t even include that. Egg yolks add richness and colour, omitting the need for any butter or oil. The effect is not a moist cake, but a super super pillowy one. Seriously, it’s so soft and spongy!

I was convinced rolling the cake up would be impossible, but I promise it’s easy. The hot cake is rolled as soon as it’s out of the oven, with the help of a towel to prevent burns and the cake from sticking to itself. Then you let it cool in the fridge and when you unroll it, it retains the shape, so that after you’ve spread the filling onto it, you can roll it back with no hassles. At the most, you’ll see a small crack, it’s nothing that’ll cause damage I promise. Be gentle but confident 😀

The other super helpful tip I saw during my extensive research online was to wrap the filled cake tightly in clingfilm and let it chill in the fridge. This way, the cake firms up and can be sliced easily, without any fear of it unravelling. Any filling that may spill out while you roll it, can simply be spooned back into each slice, no biggie!
The flavour of the cake is neutral despite me being heavy-handed with the vanilla because I was concerned about an eggy aftertaste, but there is none. It’s the perfect base for pretty much any filling you like! A cream cheese frosting, buttercream, maybe a whipped ganache because I really want to try a chocolate version soon! It tastes like a dream, super fluffy and so fresh with the mangoes and sweetened whipped cream. None of the steps are time consuming or hard, so I hope you’ll try this soon!
Please read the recipe notes before beginning.
Mango & Cream Roll Cake
Ingredients
For the cake
- 1/2 cup all-purpose flour
- 1/2 tsp baking powder
- 1/4 tsp salt
- 2 eggs at room temp (integral to the recipe, I can't suggest substitutes here)
- 1/8 cup + 1/3 cup caster sugar
- 1 tbsp plain yoghurt
- 1 and 1/2 tsps vanilla extract
- 1/3 cup icing sugar, plus more to sprinkle on top
For the filling
- 1/3 cup whipping cream, chilled at least 24 hours
- 2 tbsps icing sugar
- 1/4 tsp vanilla extract
- 1 small mango, peeled and thinly sliced
Instructions
- In a bowl, sift the flour, baking powder and salt. Set aside.
- Grease an 8" square baking pan and line it with non-stick baking paper, leaving a little overhang for easy removal. Set aside.
- Preheat the oven to 175 C.
- Separate the eggs, adding the whites to a large mixing bowl along with 1/8 cup caster sugar, and set aside the yolks separately. Beat the whites and sugar with a hand mixer on high speed, until very thick and fluffy. The whites should form stiff peaks when you lift the beaters.This takes about 3 to 4 minutes.
- Transfer the whites to another bowl, and add the yolks to the mixing bowl, along with the remaining 1/3 cup caster sugar, yoghurt and vanilla. Beat for about 3 minutes until thickened and pale.
- Now fold half the whipped egg whites into the whipped yolks. Be gentle, taking care not to deflate the mixture. Add the other of egg whites and fold till combined.
- Add the flour mixture and fold again gently. If there are lumps, run the hand mixer through it, but take care not to over beat.
- Tip this batter into the prepared cake pan and smoothen it out in an even layer. Bake for 10 minutes, or until the top feels springy and a toothpick poked in the center comes out completely clean.
- While the cake is baking, spread a clean kitchen towel out on the counter. Sprinkle liberally with the icing sugar because this is what stops the base of the cake from sticking to the towel. It doesn't matter what size towel you use as long as it is long enough to hold the entire cake.
- Once the cake is done, let it sit for just a minute, then remove from the pan using the paper. Quickly flip onto the sugared towel and peel off the baking paper gently. Now roll the cake and towel together into a tight cylinder. The towel will protect your hands from the heat of the cake. It is supposed to be between the folds of the cake to prevent it from sticking to itself, so don't try and avoid it coming in the way!
- Let the rolled cake cool for 15 minutes at room temperature, then place in the fridge for about 2 hours or until completely cold.
- When ready to assemble, slowly unroll the cake and the towel too. I found that the towel got a little stuck towards the end, so be gentle here. You may see a couple of small cracks but the cake will still hold its shape. Gently remove the towel from underneath the cake.
- Let the cake rest, unrolled, while you prepare the filling.
- Beat the cream, sugar and vanilla on high speed with a hand mixer until the cream is very thick and forms stiff peaks when you lift the beaters (see notes).
- Now spread the cream onto the unrolled cake, leaving about half an inch around the edges. Make sure the cream is not a very thick layer or it may spill out quite a bit. You may not end up using all of the cream, but leftover whipped cream will keep for 2 to 3 days in the fridge. It's harder to beat a very tiny quantity of cream, so some extra is ok.
- Arrange the sliced mangoes in a single layer on top of the cream.
- Now slowly begin rolling up the cake again, pushing the mangoes in as you go because they will tend to slide around a bit. Some of the filling may ooze out, it's absolutely ok because you can scoop it up and save it to top the slices with later on.
- Once the cake is rolled, place it on a large piece of clingfilm and wrap it up tightly. Place in the fridge for at least 30 minutes.
- Dust the cake with more icing sugar to pretty it up, then slice in a gentle, sawing motion preferably using a sharp, serrated knife. Spoon any leftover filling into the center of each slice, to make sure there's plenty of mango in every bite! Serve immediately, or store in the fridge in an airtight tin for 2 to 3 days. Happy baking!
Notes
This post contains affiliate links.







Pingback: Banana Roll Cake
Pingback: Chocolate Roll Cake