As you may have already guessed, I think about cake A LOT. It’s part of um, the job description, if you will. I fret about it, I analyse it, I talk to myself about it. My brain is a very busy place on the days that I’m obsessing over cake. But, has there been a better obsession? I think not.
It all started when I tried a slice of honey cake in Russia for the very first time. OHMYGOD. I had no idea what magic was buried deep within, but it emerged in a sort of ginger-y, graham cracker-y, caramel-y, sweet but tangy paradise. Layers, sooo many layers. A filling made of their special sour cream. And basically, a dessert that wasn’t really ‘fancy’ but tasted like a million bucks.
I took back this vague thought of recreating it some day for the blog. I had a lot of questions and a ton of enthusiasm and because you guys on Instagram are the BEST, I was cheered on as I tried this very involved, but not actually difficult creation. I’m so excited to share it with you and also, seriously amazed I actually pulled it off.
There are many different perspectives on how this cake is traditionally made. So while I don’t know if mine is the most authentic, it sure is delicious and reminded me a lot of the one I had on that first cold day in Moscow. If anyone here is an expert on this honey cake or medovik, I’d love to know what you think. And with that, I present to you, more photos and more honey cake monologuing than you are probably prepared for. Enjoy!
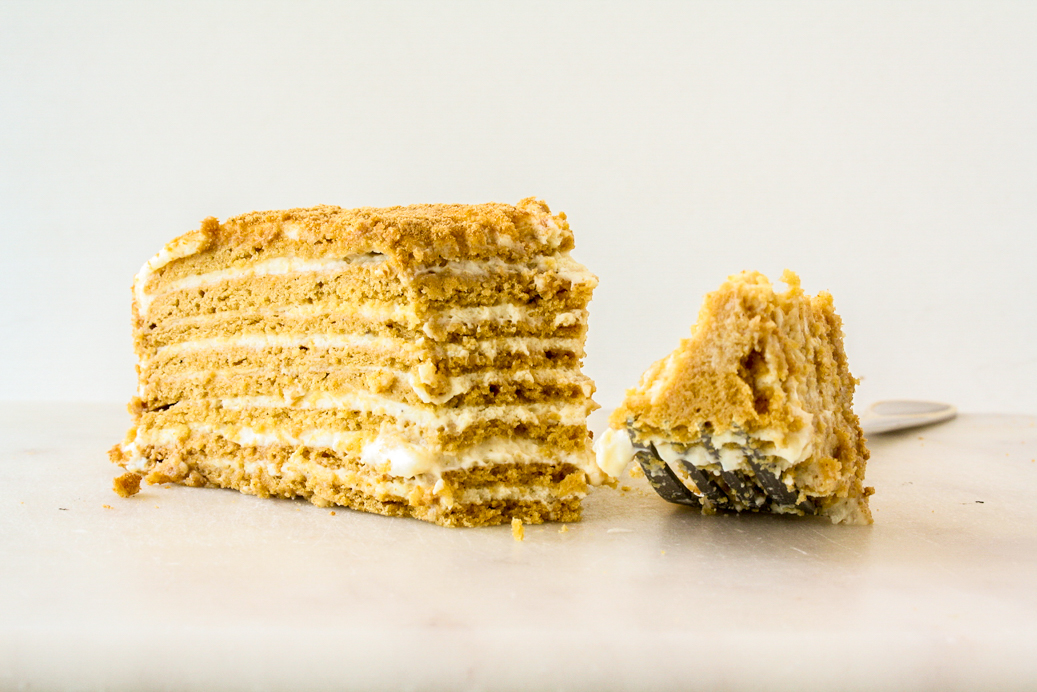
Apart from cafes and restaurants, I saw medovik sold in supermarkets as chilled or frozen packages. I figured if it was that easily available and so many households made it regularly as well, it really must be something doable!
Fundamentally, this cake is like an icebox cake, soft cookies sandwiched with frosting that soaks into said cookies and forms a cake as it chills overnight. I found two recipes I really liked the sound of. One, by Smitten Kitchen because of course Deb has asked the questions I had in my head and found answers to them and also the comments on that recipe open up all kinds of doors. She does warn though, that the filling is so runny, it becomes almost impossible to assemble the cake. In the kind of summer Mumbai is already facing, I figured I shouldn’t add to the melty-ness of the cake. Enter, a recipe by Bake From Scratch which also adds thick whipped cream, and in my mind, that should give the frosting a little bit of body and maybe not ooze everywhere? They also add spices to the biscuit dough which I had to do because that was the taste I remembered. Ginger, definitely. Honey, definitely.
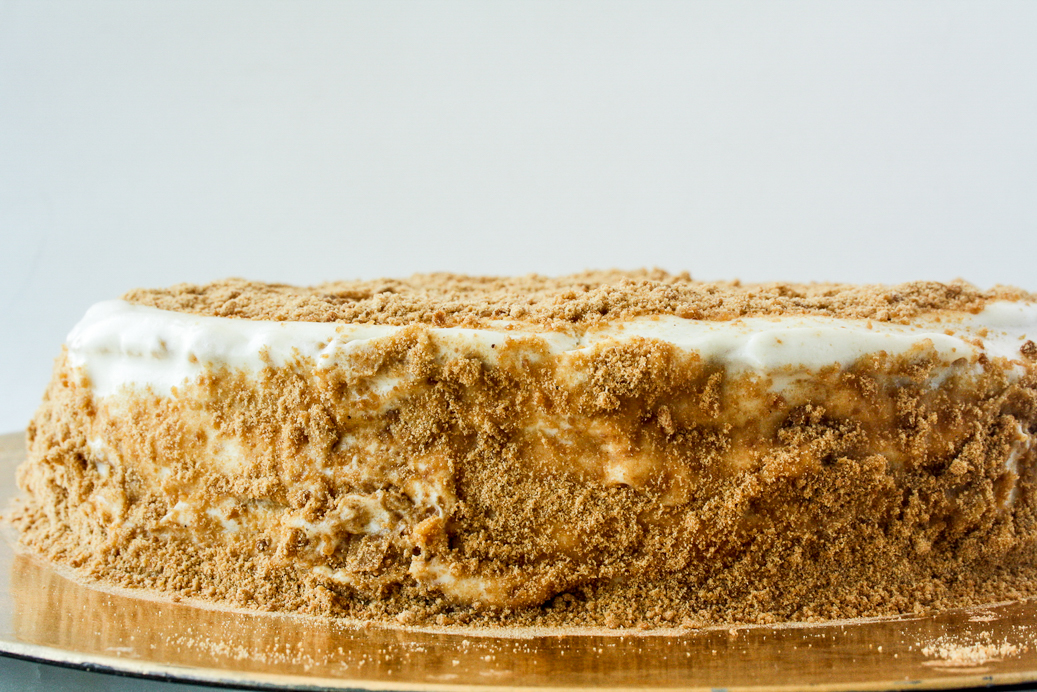
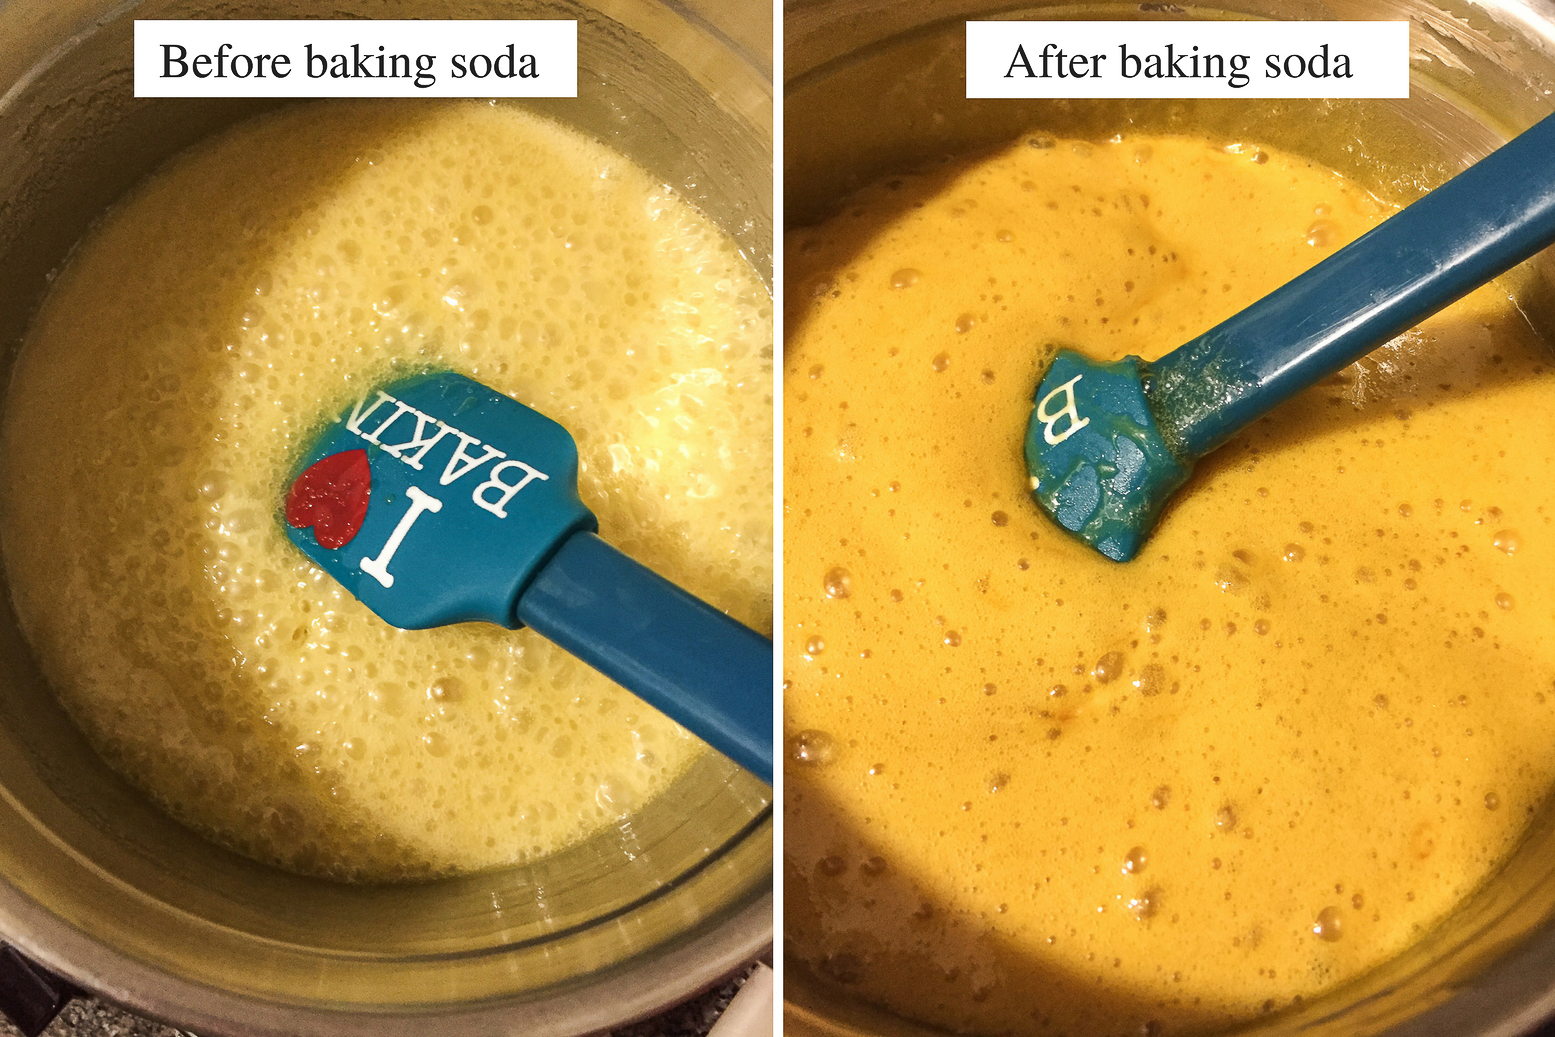
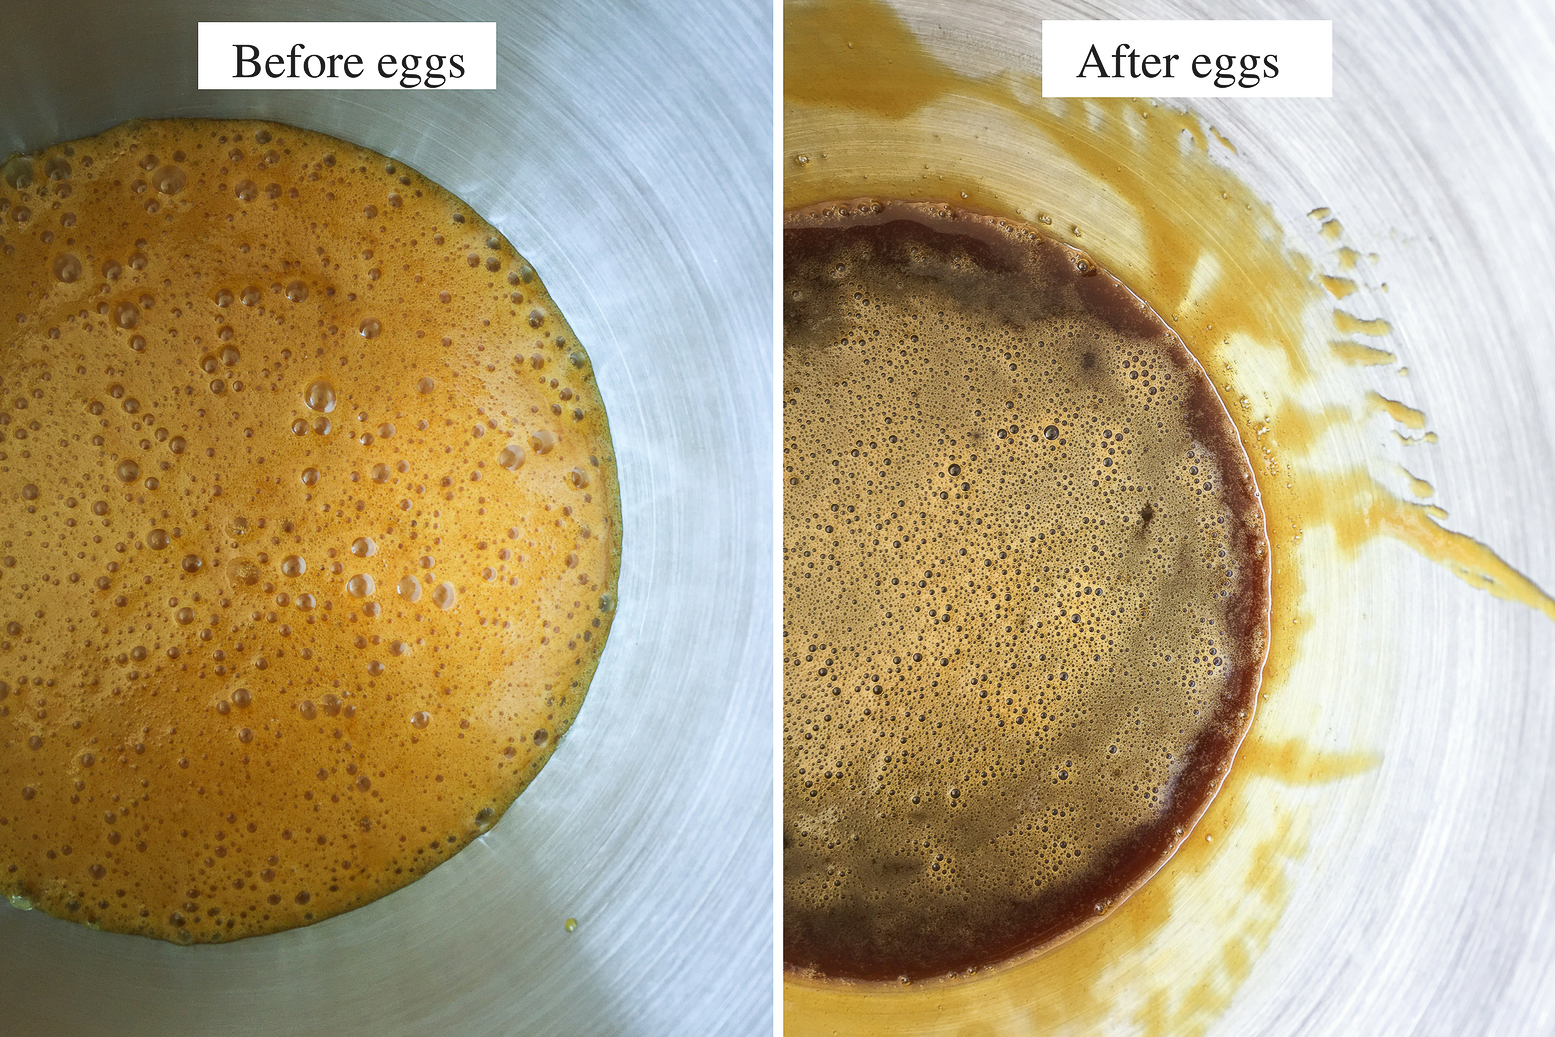
And so I decided to do sort of combine the two and see what happens. The biscuit dough is actually the part that needs a little more attention (scroll right to the end of this post for some badly lit but helpful in-process photos). It’s not mixed up like a regular dough. Instead you’ll melt the butter, honey and sugar, then add the eggs very slowly and then mix in the flour. There’s also a little baking soda action which is SUPER fun to do, everything bubbles up and changes colour and you feel like a mad scientist or like you’re back in Chem lab again, whatever floats your boat.
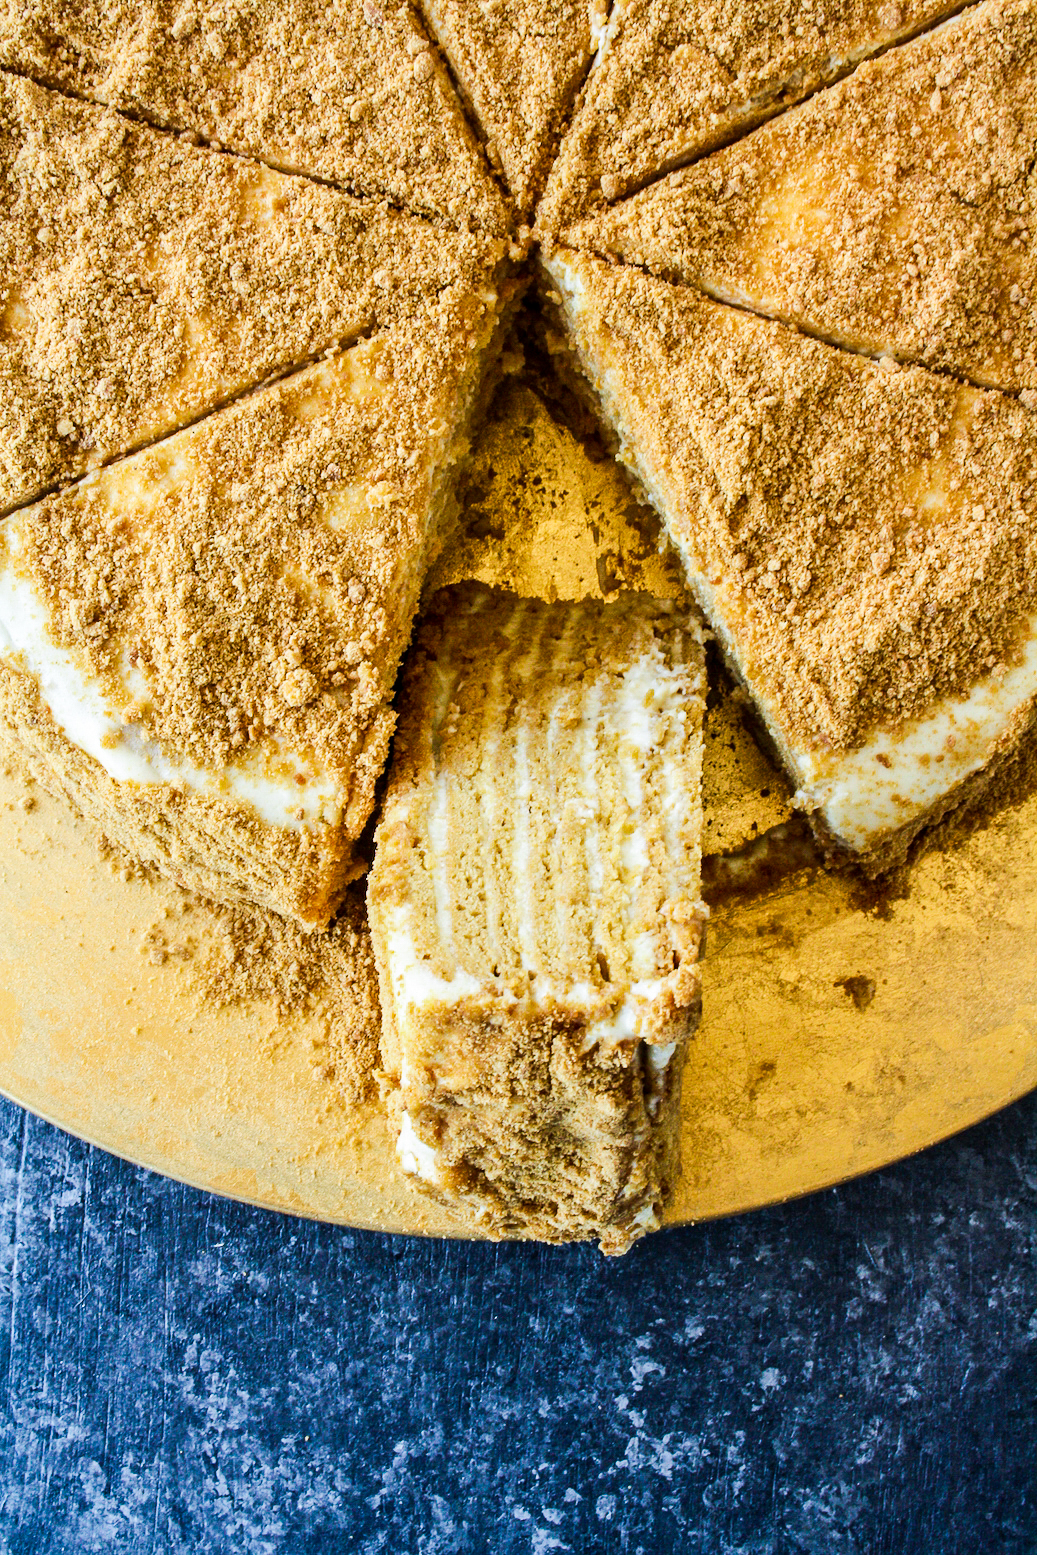
At this point, I have to point out that I used a stand mixer and cut out pretty much all the muscle work here because the dough is thick, sticky and very much like a bread dough. You can do this by hand, it may take a little longer but don’t let that scare you.

You will then go on to roll out the dough while it’s still warm and luckily, Mumbai’s temperature worked in my favour here because the dough remained soft and pliable throughout, even at room temperature. Each cookie is baked individually, so this takes a bit of an assembly line of rolling-baking-cooling and but nothing that can’t be handled. Clear as much counter space as you can, and you’re good to go.

Then comes the filling. I was a little stumped here because though sour cream is traditional, the world seems divided between what else to add. Honey? Sugar? Whipped cream vs condensed milk? It was all very confusing. I had decided on a sour cream+condensed milk combination but realised the packaged sour cream wasn’t easily available in India and when it is, is also expensive. I’ve used hung curd many times as a replacement and it looked EXACTLY like the one box of Amul sour cream that I did manage to get my hands on. But making it at home is super easy, so much fresher and so much cheaper. But because when you hang curd, the resulting thicker curd is a fraction of the original amount, I had way lesser than I had intended (500 gms vs the recommended 900 gms). That’s when I decided to add a little whipping cream to it. It helped balance the flavours and keep the frosting thicker and sturdier than I had thought it would be. I did think the condensed milk could be reduced, but even so, the entire thing was wonderfully balanced.
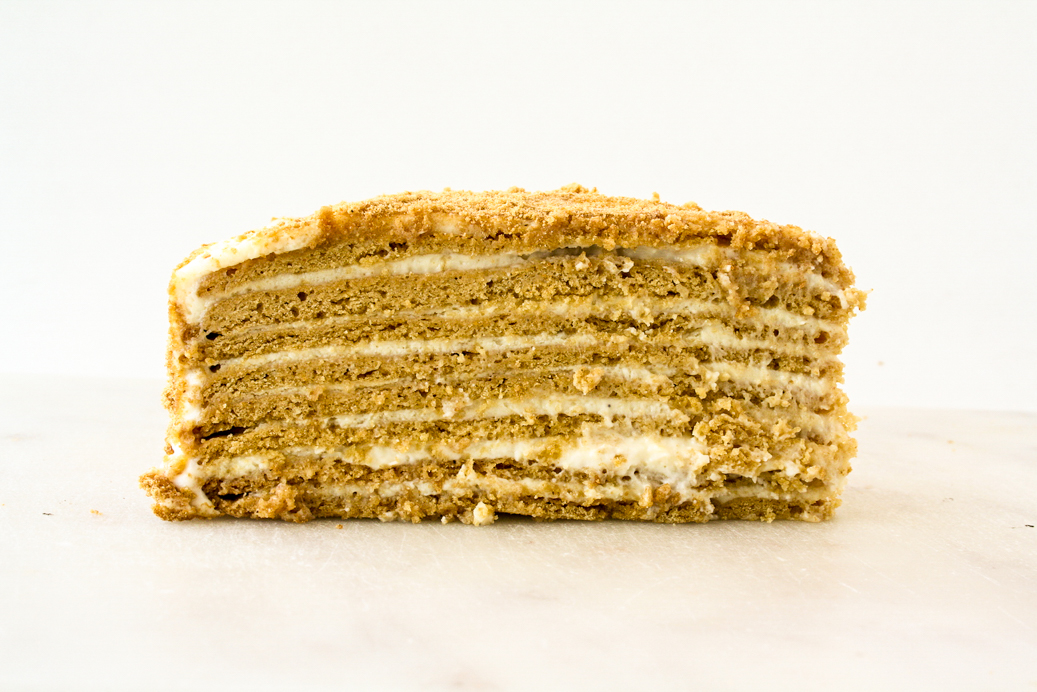
So I’m going to recommend making the frosting the way I did because it seemed to suit the Indian ingredient and weather conditions. It soaks in beautifully into the layers and even though I was panicking all night about doing things on a whim, it turned out I needn’t have worried. The cake really was incredible!
And finally, there is enough cookie dough leftover (after 8 layers) to maybe make two more. But that would make a taller, more unmanageable cake and so instead, it’s a better idea to bake the remaining dough as a thin, way darker and crispier cookie, then blitz it up into crumbs to sprinkle on the cake, which is what is normally done. You may not need to blitz up the entire thing, you can even just munch it up as is because the baked cookies taste great!
The cake needs a significant amount of chilling time. Once just after layering it with the frosting and the second time after you frost the sides because the layers slide around too much for you to do it all at once. But all of that is worth it and necessary for the best flavour and texture. The cake softens without becoming soggy and tastes at once of spices, honey and cream. It is a real labour of love and I do hope you make it. Get back to me with feedback and other ways of making it if you know any!
In-process photos just after the recipe. Make sure all your ingredients and dishes are kept ready before you begin. Once the process starts, it moves quickly so don’t waste time hunting for things!
Please read the recipe notes before beginning.
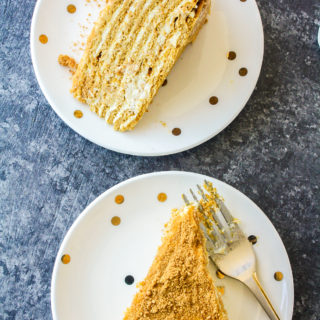
Russian Honey Cake
Ingredients
For the cake
- 3 and 1/2 cups all-purpose flour
- 1/2 tsp ginger powder
- 1/2 tsp cinnamon powder
- 1/2 cup honey
- 1/2 cup butter, at room temp (salted or unsalted)
- 1/2 cup caster sugar
- 1 tsp baking soda
- 3 eggs (see notes)
- 1/4 tsp salt
- 1 tsp vanilla extract
For the filling
- 500 gms sour cream / hung curd
- 400 gms condensed milk
- 1/2 cup whipping cream, chilled
Instructions
- Sift the flour and spices in a large bowl. Set aside.
- In a sturdy, deep saucepan or pot, combine the honey, butter and sugar. Place on low heat and stir frequently until melted. It will begin to simmer, then bubble and look frothy. Plus it'll smell amazing! At this point, add the baking soda, stir quickly and take the pot off the heat. The mixture will change colour, darken and bubble up a lot. It will almost double in volume.
- Set aside to cool and settle for a few minutes. If using a stand mixer for the next step, pour this mixture into the bowl and fit the whisk attachment.
- In a smaller bowl, lightly beat the eggs. Now holding the bowl high, pour the eggs into the still warm butter-honey mixture in a very thin stream. This prevents the eggs from cooking as soon as they hit the mixture. If using your hands, whisk constantly with one hand while pouring with the other. If using your stand mixer, keep the mixer running at high speed until the eggs are completely mixed in. The mixture will darken and look thinner. Mix in the vanilla and salt.
- Now switch to the paddle attachment on the stand mixer, or a sturdy silicone spatula if using your hands.
- Add the flour gradually and let the mixer run constantly on low speed to beat it all in. If using a spatula, this is going to take some muscle work. The dough is thick, sticky and bread-like.
- Lightly flour a silicone baking mat (or the kitchen counter if you prefer). Keep two baking trays and an extra silicone mat or two sheets of baking paper ready. Preheat the oven to 175 C.
- Scrape the dough out onto the floured surface. Give it a couple of quick kneads to bring it together, then pat into a smooth round and cut into 8 equal pieces. Set aside each peace on a lightly floured surface, making sure they aren't sticking to each other.
- Working with one piece at a time, roll it out thinly into a roughly 9" round. If you're doing this on a silicone mat, there will be very little sticking. Sprinkle flour lightly as needed. Place an 8" plate (I used my cake tin base. You can also use a bowl 8" in diameter) on the rolled out dough and press lightly. Trim the edges (save all the trimmings!) and lift the plate off. You should have a perfectly round circle, yay!
- Prick the circle of dough all over with a fork, then slide the mat onto a baking tray and bake for 7 to 10 minutes until lightly browned and puffed. I stuck to 10 mins baking time because I found the cookies were going soft quite fast when left at room temperature because of the humidity. If it's not very warm where you are, 6 to 7 minutes should be enough. Remember that they will soften once they absorb the filling so they shouldn't be under-baked. Either way, keep a close eye on the cookies as ovens vary.
- Repeat with each remaining piece of dough. Roll out the next one while the previous is in the oven. Slide it in while that earlier one is cooling and so on. Once you get the assembly line going, it's quite fast!
- Allow the cookies to cool completely at room temperature. In the meantime, ball up the trimmings and roll them out thinly, in any shape. Bake for about 10 to 15 minutes (depending on thickness) or until crisp and darkened much more than the individual cookie layers you just baked. Allow to cool, then break into pieces. Blitz them in a food processor until finely crumbed. You will likely have more cookie crumbs than needed to decorate the cake, so if you prefer, blitz up only half the amount and then see if you'd like to blitz the rest of the pieces too, or keep them for snacking!
- When the cookies are completely cool, bring out a large serving platter.
- In a mixing bowl, beat the sour cream/hung curd with a hand mixer for a few seconds, then add half the condensed milk and beat again till smooth and creamy. Add the whipping cream and beat till the mixture thickens and very soft, rounded peaks form when you lift the beaters up. You are not looking to fully beat it as you normally would with whipping cream, just enough to give the filling some structure. Now taste it and add the remaining condensed milk a little at a time as needed. I did use the whole amount, but wouldn't have minded a little lesser as well.
- Place one cookie on the cake plate. Top with 1/2 cup frosting and spread it around evenly, leaving a thin border around the edge as it will spread. Place the next cookie on top and repeat till all 8 layers are frosted, including the top of the final layer. Sprinkle on some of the cookie crumbs all over the top. Place in the fridge overnight to chill, along with the remaining frosting which is about 1/2 cup. This overnight chill helps the cake soften so that it holds together when you frost the sides.
- The next day, spread the frosting on the sides. Now sprinkle the crumbs on the sides as well. It's ok if most of them end up on the plate, simply pick them up and patch up any unfrosted bits. The beauty is in the layers when you cut the cake, so don't fret about the crumbs! Let the cake chill again for about 2 hours.
- Slice into even pieces using a sharp, long knife for best results. Admire your work, praise yourself and dive in! This cake needs to be stored in the fridge at all times where it will keep for 4 to 5 days. It can also be frozen for longer.
Notes












Pingback: Top 10 Recipes of 2019!
it is indian honey cake!!! the original recipe is very different!!!
Pingback: Top 10 Recipes of 2018!
Hi Gayatri,
I have a few questions
Does frozen paneer work in place of hung curd?
Do you think I could use diy sour cream (cream +lemon) instead of hung curd?
Which brand of whipping cream did you use?
Am also from India so I was quite happy to find your recipe thinking I could perhaps get the same brand of ingredients you used.
It’s cool where I live so will it be safe to leave the fully assembled cake out for a day or two?
Hi Esther, I used Amul whipping cream but you can use any brand you find. For the hung curd, I would suggest using soft malai paneer if you need a substitute, whipped till is very smooth but it will definitely change the flavour and it wouldn’t be my first recommendation. And I use hung curd as a substitute for sour cream if needed, so plain cream and lemon mixed together is not something I’m certain about. Amul also makes a sour cream if you can find it. But on the whole, I’d say hung curd is still the easiest option for both your questions. The cake will best retain its shape in the fridge, and with so many dairy products, I think it’s safer than leaving it at room temperature though you can your judgement here.
Please tell me the substitute of eggs.
I really don’t think there is a substitute here, eggs are very integral to this recipe, sorry!