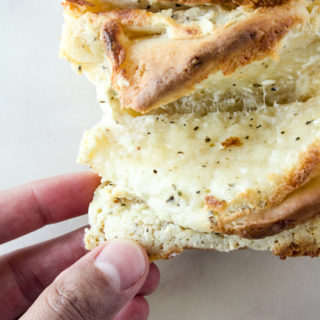
Pull-Apart Cream Cheese & Garlic Bread (Eggless)
A soft and buttery pull-apart bread with a garlicky cream cheese and cheddar filling!
Prep Time: 30 minutes
Cook Time: 30 minutes
Total Time: 1 hour
Makes: 6 x 4 loaf
Ingredients
For the dough
- 1/3 cup whole milk
- 1/2 tbsp caster sugar
- 1/2 tsp active dry yeast
- 1 and 1/2 tbsps melted butter, not hot
- 1 cup all-purpose flour, plus more for sprinkling
- 1 tsp garlic powder, optional
- 1/4 tsp salt
For the filling
- 1/2 cup cream cheese
- 1/4 cup grated cheddar or mozzarella cheese
- 1/4 tsp salt
- 1/4 tsp mixed herbs
- 4 garlic cloves, minced
Instructions
- Heat the milk and sugar together in a microwave-safe mixing bowl until the mixture is warm, but not hot. You should still be able to comfortably dip a finger in it. Stir in the yeast and cover the bowl with clingfilm. Let it rest for 5 to 10 minutes, until the mixture becomes frothy.
- Add the butter to the bowl, followed by the flour, garlic powder and salt. Give it all a good stir. Since this is a small quantity of dough, there is no need for a mixer.
- Bring the dough together with a silicone spatula, into a shaggy mass. Knead once or twice with your hands, then turn it out onto a lightly floured surface. Now knead for 3 to 4 minutes until smooth and soft. If you poke a finger on the surface of the dough, the dough should slowly bounce back. This is when you know it's ready to rise.
- Lightly oil the mixing bowl, place the dough in it and turn it around to coat all sides. Cover with clingfilm and let it rise at room temperature for 1 to 2 hours, until doubled in size. To speed up the rise, you can turn your oven to 100 C for just a few seconds, turn it off, and place the covered bowl inside.
- To make the filling, combine all the ingredients and mix vigorously with a spoon until smooth and creamy. Set aside. Line a 6x4 inch loaf tin with non stick baking paper. You can also just grease the tin but I found it harder to get the bread out this way.
- Now place a silicone mat on the kitchen counter (prevents stickiness in warm kitchens, but you can also do this directly on the kitchen counter), and tip the risen dough onto it. Press down gently to release the air, then flatten into a roughly 6 x 8 inch rectangle. There isn't really a need to be very precise here. Spread the filling all over the dough in an even layer.
- Now slice the dough further into eight equal squares or rectangles. It is more important that they're the same size, rather than a specific measurement.
- Fold each piece in half, then place in the prepared loaf tin, pressing them tightly against each other and making sure the filling side is pointing upwards. Once you've placed all eight pieces in, cover the tin with clingfilm and set aside to rise for 1 more hour. The dough will be a little puffier, but not exactly doubled.
- Preheat the oven to 190 C. Remove the clingfilm and bake the bread for 25 to 30 minutes, until the top has browned. The filling may ooze out a little, but it will get absorbed back into the bread as it cools. The crispy brown bits on the side are delicious!
- Allow the bread to cool in the tin for 15 minutes, then remove and dig in! Pull it apart with your fingers, it's the best and only way to eat it! Store leftovers wrapped in foil for 2 to 3 days in the fridge. Happy baking!