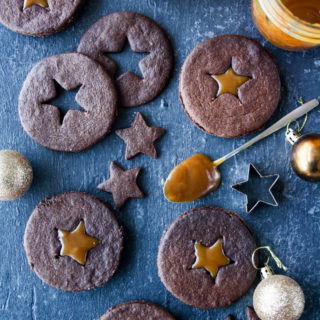
Chocolate & Salted Caramel Sandwich Cookies
Crisp, festive chocolate cookies with a salted caramel filling!
Prep Time: 30 minutes
Cook Time: 10 minutes
Total Time: 40 minutes
Ingredients
- 1 cup flour
- 1/3 cup cocoa powder (see notes)
- 1/4 tsp baking soda
- 1/2 cup butter, at room temp (115 gms)
- 1/2 cup caster sugar
- 1 egg yolk (see notes)
- 1/2 tsp vanilla extract
- For the filling: 3/4 cup salted caramel at room temp
Instructions
- Sift the flour, cocoa, baking soda and set aside.
- In a large bowl, cream the butter and sugar till light and fluffy. Add the egg yolk and vanilla, beating till combined.
- Add the flour mixture and fold gently, till a soft, sticky dough forms.
- Tip the dough out onto a piece of clingfilm, wrap tightly and chill for 30 minutes to an hour.
- Preheat the oven to 175 C. Lay out a silicone baking mat (so that you can easily roll and transfer cookies to the oven). Alternatively do this on a floured surface or baking paper.
- Divide the chilled dough into two halves which makes it easier to roll. Keep the second half chilled.
- Let the dough soften slightly for 5 minutes at room temperature, then place it on the mat. Cover with a large sheet of clingfilm and roll out to about 1/4 inch thickness. The thinner, the crispier, but also higher the chances of the cookies burning. I find this clingfilm method the easiest as the dough is sticky and you can avoid a mess this way.
- Use a 3 inch cookie cutter (or a bowl or glass of that diameter), to cut circles in the dough, about an inch apart. In half the circles, cut out a little star shape, about 1 inch wide. (Save the stars and bake them at the end.) Place the cut cookies back in the fridge for 15 minutes, then peel away the scraps of the dough. I find that when the dough is cold, it's easier to do this and you don't need to move around your neatly cut shapes which means they look good even after baking!
- Slide the mat onto a baking tray and bake for 10 to 12 minutes, rotating the tray halfway through baking. The ones with the star cut into them will bake a little faster. If you prefer, you can bake one tray of only bottoms (without the stars) and one tray of only tops (with the stars). Cookies are done when they are slightly puffed, darkened and have some small cracks on the surfaces. Set aside to cool for 10 minutes on the tray itself as they will break if you try and lift them immediately. Transfer to a wire rack to cool completely.
- Re-roll the scraps and the second half of the dough. In all, you will have about 24 cookies. Make sure you have equal numbers of tops and bottoms, no matter what size your cookies are.
- When the cookies have completely cooled, spread 2 teaspoons of salted caramel on each of the cookie bottoms, leaving the edge plain. Cover with the top halves (the one with the star cut outs) and press down lightly. I like to chill these in the fridge but you can leave them at room temperature for a day in an airtight tin. They will last in the fridge for a week, if not more. Happy baking!
Notes
*Use store-bought or homemade salted caramel. You could also your favourite jam, whipped cream or melted chocolate as a filling.
*Instead of the egg yolk, I've also used milk as a substitute as you can see here. You'll need 3 to 4 tablespoons to help bind the dough.
*If you have Dutch-process cocoa (I like Indah brand), that creates a more intense flavour and deeper colour. Otherwise a natural cocoa like Hershey's or Cadbury is fine too. Read more about the differences in cocoa here!
*You can use any cookie cutter shape or size. Baking time will vary so if you're making smaller cookies, bake for less time and longer for larger cookies.
*Cook time is per batch of cookies. Prep time does not include dough chilling time.
*Adapted from Smitten Kitchen