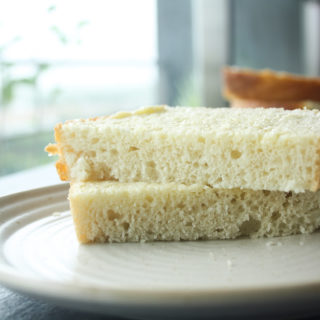
Homemade White Bread
Homemade, tender, chewy white bread!
Prep Time: 20 minutes
Cook Time: 30 minutes
Total Time: 50 minutes
Ingredients
- 2 and 1/4 tsps active dry yeast
- 6 tbsps warm water just hot enough that you can dip your finger in comfortably
- 1/8 cup caster sugar
- 1 and 1/2 tbsps butter at room temp
- 2 tsps salt*
- 4 to 5 cups all-purpose flour
- 1 and 1/3 cup water at room temp
- 1 and 1/2 tbsps butter melted
Instructions
- In a small bowl, mix the yeast and warm water, then cover and set aside for about 10 minutes. The yeast needs to activate and become frothy.
- In a large mixing bowl or in the bowl of a stand-mixer (fitted with a dough hook), combine the sugar, butter and salt. Mix lightly, then pour in the yeast mixture. Mix again.
- Add 4 cups of flour and the water. Let the mixer run on low speed to bring the dough together, and add the remaining 1 cup of flour a little at a time to make a soft, not very sticky dough. I used 4 and a 1/2 cups total, you may need more or less.
- Let the mixer run for about 10 minutes, or knead by hand for 10 to 12 minutes. If the dough is very sticky, sprinkle on just a little more flour to help bring it together. The dough should ideally be smooth and soft, with just a little stickiness. Depending on how warm your kitchen is, the dough may remain quite sticky even after 10 minutes, so getting your hands in there is the best way to judge the texture. It should slowly bounce back when poked.
- Turn the dough out onto a lightly floured surface. Lightly oil the mixing bowl, then put the dough back in and turn it around to coat all sides. Cover the bowl with clingfilm and set aside for 1 to 2 hours until doubled in size. A good way to speed up the rise, is to turn your oven on to 100 C for just a few seconds, turn it off, then place your mixing bowl in it. You can repeat this a few times during the rise.
- In the meantime, lightly grease a 9x5 loaf pan. I preferred using oil to grease rather than butter, because the butter seemed to make the sides of the bread a little damp.
- Once the dough has doubled, punch it down to release the air. Turn it out onto a lightly floured silicone mat (or just the kitchen counter if you like), and pat it into a 9x12 rectangle, with the shorter side facing you. The 9" width is important to ensure your loaf fits in the pan.
- Starting at the bottom of the rectangle (the shorter side), roll up the dough tightly into a cylinder, then tuck the ends under itself to seal. Lift it up and place in the prepared loaf pan.
- Cover the pan loosely with clingfilm and set aside for another 1 to 2 hours until doubled. You can repeat the oven trick here if you like.
- Towards the end of the rise, preheat the oven to 200 C.
- Remove the clingfilm, brush half the melted butter on top of the loaf and set it on a baking tray. Make sure it's placed in the lower half of the oven so that the top doesn't burn.
- Bake for 15 minutes, then rotate the tray and bake for another 15 minutes. If the loaf is browning too quickly, cover the pan loosely with foil.
- The finished loaf will have a dark, very firm crust. As soon it's out of the oven, brush it with the remaining melted butter, which will help the crust soften and develop a lovely flavour.
- Allow the loaf to cool in the pan for 15 minutes, then gently run a blunt knife around the edges to help loosen it. Pull the loaf out, and rest it on a wire rack. Let the bread cool completely before slicing, though it's tempting to eat it warm! You should have a soft, slightly chewy loaf that should make you very proud!
- Store the bread for one night at room temperature, wrapped in a layer of baking paper and foil. On day two, the bread may be a little drier, simply toast it and enjoy! Store in the fridge from day two onwards :) Happy baking!
Notes
*I used Kitchenart active dry yeast, but have also successfully used Bluebird in the past.
*If using unsalted butter, increase the salt to 4 tsps.
*Prep-time does not include rise time, which will be about 6 hours.
*Half wholewheat version: I've now started making a half wholewheat version of this loaf, with 2 cups wholewheat flour and 2 cups all-purpose flour. To make sure the wholewheat flour doesn't dry out the bread, use 3 tbsps of butter, 1 cup of water and 1/3 cup milk. The 6 tbsps of water needed to dissolve the yeast stays the same. I didn't need any more than 4 cups of flour total while kneading, and the dough was surprisingly easy to work with. The extra butter seems to keep the dough soft and supple, not sticky. If you need more flour to smoothen the dough, use all-purpose as too much wholewheat will make the bread dense. The bread will look like it does in the photo below.