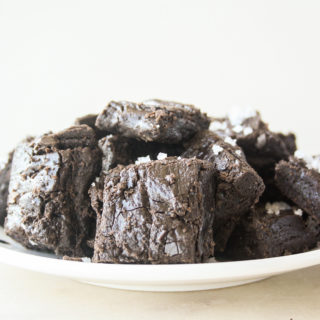
Salted Dark Chocolate Fudge
Homemade from-scratch fudge made with dark cocoa and topped with sea salt!
Prep Time: 15 minutes
Cook Time: 30 minutes
Total Time: 45 minutes
Makes: 20 to 25 pieces
Ingredients
- 1/4 cup cocoa (I used an extra dark one, but regular is fine)
- 1 and 1/2 cups white sugar
- 1/2 tsp salt
- 1 cup whole milk
- 30 gms unsalted butter, at room temp (2 tbsps)
- 1 tsp vanilla extract
- Iced water as needed
- Sea salt, to sprinkle on top
Instructions
- Make sure all your ingredients are ready to go, don't spend time looking for anything once the fudge is cooked. Line a shallow 8x4 baking pan with non-stick baking paper.
- In a sturdy, large and deep saucepan or pot, combine the cocoa, sugar and salt. Mix and then add the milk. Use a whisk to bring it all together but don't worry about lumps.
- Set the mixture on medium low heat and bring to a boil, stirring only once in a while to make sure it isn't sticking. Overall, it's best to let the mixture cook undisturbed. You will notice it begins to simmer and then boil in about 10 minutes. Though I read that you can start testing the mixture at this point, I found it didn't reach the soft ball stage till much later. You will see it beginning to foam and form smaller, tighter bubbles.
- When these bubbles appear (10 to 15 minutes), add a little ice water to a shallow bowl. Drizzle a little of the mixture into it. If it forms a flat layer on the surface of the water, keep boiling. If it falls to the bottom and clumps just a little when you push it with your fingers, it's getting there. Keep changing the water and drizzling the mixture in until you can gather the mixture up in your fingers and form it into a soft, pliable ball. This could take more or less than 30 minutes, a lot depends on the weather as well. So don't be alarmed if the timing is different for you. The video linked in the notes below is really helpful!
- After the soft ball stage is reached, turn off the heat and place the pot on a cool surface like the kitchen counter. Add the butter and vanilla. Let the butter melt on its own.
- Once it has melted almost completely, grab a wooden spoon and beat vigorously about 6 to 7 minutes. This is an arm workout for sure! The mixture will thicken and continue to look glossy for a few minutes. After about 6 minutes, stop beating and if you notice that it looks less glossy, almost matte, your fudge is done. If not, keep beating. Transfer the cooled, not-glossy fudge to the prepared pan and smoothen the top as best as you can because by this time, it will already have begun to harden.
- Sprinkle the top with sea salt and let it cool completely at room temperature. You can cut it now if you wish, but I find that in warmer temperatures, it's better to stick it in the fridge for a couple of hours. Cut into pieces and enjoy! Best stored in an airtight tin in the fridge.
Notes
*I used extra dark cocoa powder here to balance the sweetness, but if you prefer a lighter coloured fudge, use regular cocoa.
*According to The Kitchn, if you have a candy thermometer, the fudge is ready when the temperature reaches 235 F as long as the thermometer isn't touching the base of the pan. I don't have one and prefer to go old school with the soft ball test!
*Adapted from The Kitchn and Hershey's with help from this video on the soft-ball stage.