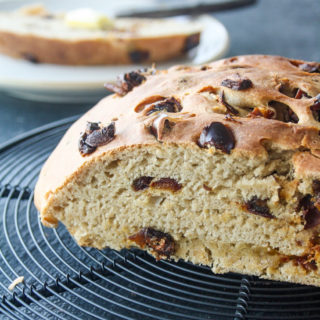
Date & Rye Bread (Eggless)
A tender, sweet loaf with chopped dates and rye flour
Prep Time: 20 minutes
Cook Time: 30 minutes
Total Time: 50 minutes
Makes: 6 " round loaf
Ingredients
- 3/4 cup warm water <i> warm enough that you can comfortably dip your finger in, not hot</i>
- 1 and 1/4 tsp active dry yeast
- 1 tbsp caster sugar
- 1 and 3/4 cup all-purpose flour
- 1/2 cup rye flour
- 1/2 tsp salt
- 2 tbsps melted butter
- 1 tbsp honey
- 3/4 cup dates pitted and chopped into small pieces
Instructions
- In a small bowl, combine the warm water, yeast and sugar. Stir well, then cover the bowl with clingfilm and set aside for about 10 minutes, or until the surface of the mixture is frothy. If this doesn't happen, it means the water was too hot or too cold. Or it could mean the yeast wasn't fresh. Start over because without properly proofed yeast, the dough will not rise.<br></br>
- In the bowl of a stand mixer fitted with a dough hook or in a large mixing bowl, combine the flours, salt, butter and honey. Give it all a good stir, then pour in the yeast mixture.<br></br>
- If using the mixer, let it run for 30 seconds on low speed just to bring the dough together, then knead on medium speed for 5 to 10 minutes. If doing this by hand, bring the dough together with a silicone spatula, then knead by hand on a floured surface for 5 to 10 minutes. In both cases, the dough is ready when it forms a smooth ball and if you poke it, the indent left by your finger should slowly bounce back. I used a mixer but I still prefer to get my hands in there and finish the kneading manually towards the end.<br></br>
- Place the dough in a lightly oiled bowl and turn it around to coat all sides. Cover with clingfilm and set aside for 2 to 3 hours until doubled in size. This may take more or less time depending on the temperature in your kitchen. To speed up the process, preheat the oven at its lowest temperature for a few seconds. Turn it off, then place the bowl inside.<br></br>
- When the dough has doubled, press it down to release the air, then turn it out onto a lightly floured surface. Flatten it a little, then sprinkle half the dates over it. Knead them in, then repeat with the rest of the dates. The idea is to get dates in every bite, so spread them out as much as you can. Save a few pieces for the top.<br></br>
- Form the dough into a ball and place it on a silicone baking mat. Press the reserved pieces of dates on the top. Now make two sharp cuts on the top of the dough ball (see photos above). This helps the inside of the bread cook and the top looks cool once it's baked too :)<br></br>
- Cover loosely with clingfilm and let it rise again for an hour.<br></br>
- Towards the end of the rise, preheat the oven to 200 C. The dough will be puffier, but not exactly doubled.<br></br>
- Slide the dough along with the silicone mat onto a baking tray. Bake for 30 minutes, rotating the tray halfway so that the top browns evenly.<br></br>
- Let the bread cool for 15 minutes on the tray, then transfer to a wire rack until completely cool.<br></br>
- Slice and enjoy with butter or cream cheese! Store tightly wrapped at room temperature for 2 days and after that, in the fridge for one week. The bread will need to be toasted after day one and it tastes amazing! Happy baking!
Notes
*I've used light rye flour here, but you can also use dark.
*While measuring flour for any recipe, always fluff it up with a spoon in the jar itself, then lightly spoon it onto your measuring cup, filling it to the top without shaking the cup at all. Then level off the top with a knife or the handle of the spoon. This is how I always measure flour, but particularly with breads, where a little excess could cause the bread to become dense and dry.