This cake is 50% whipped cream, 50% chocolate and 100% addictive. The math may be off, but you’re warned. Do not find yourself alone in a room with this cake because it is deeeeelicious and decadent enough to warrant no self control.
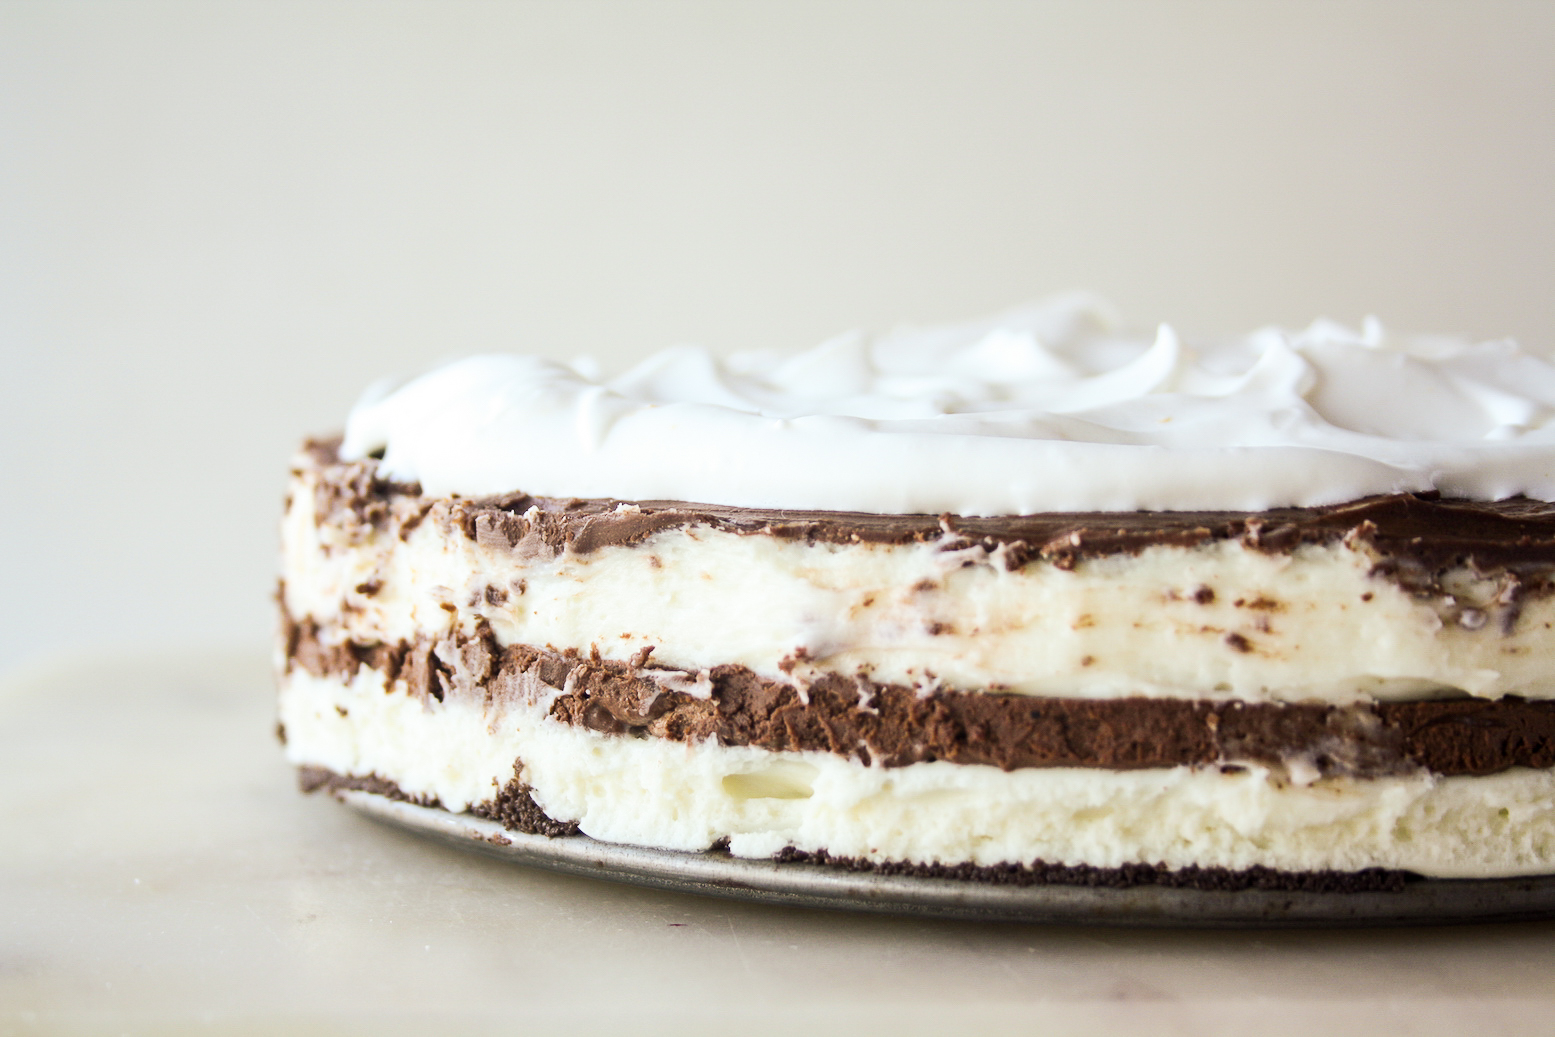
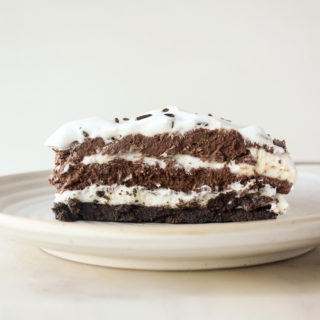
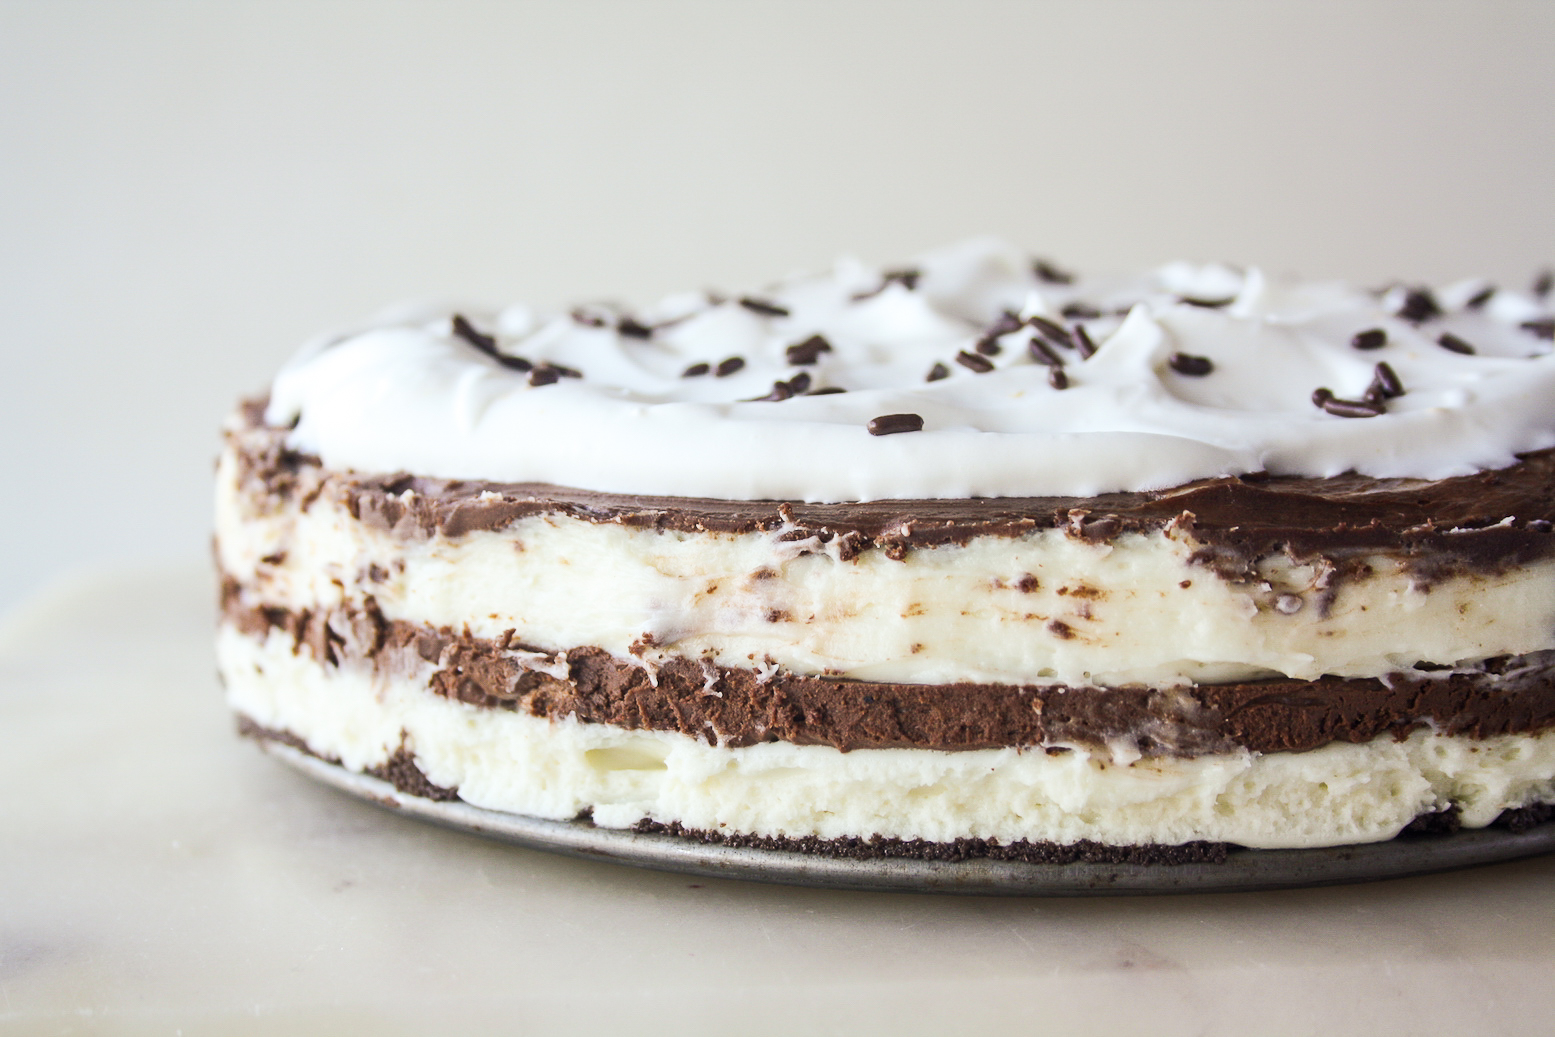
Layers of white and dark chocolate mousse on an Oreo base. We’re going in.
 The mousse here is just whipped cream and chocolate, there’s no need for eggs or gelatine when all you need is a good chill in the fridge to help everything settle in. It is light and fluffy, but super rich of course!
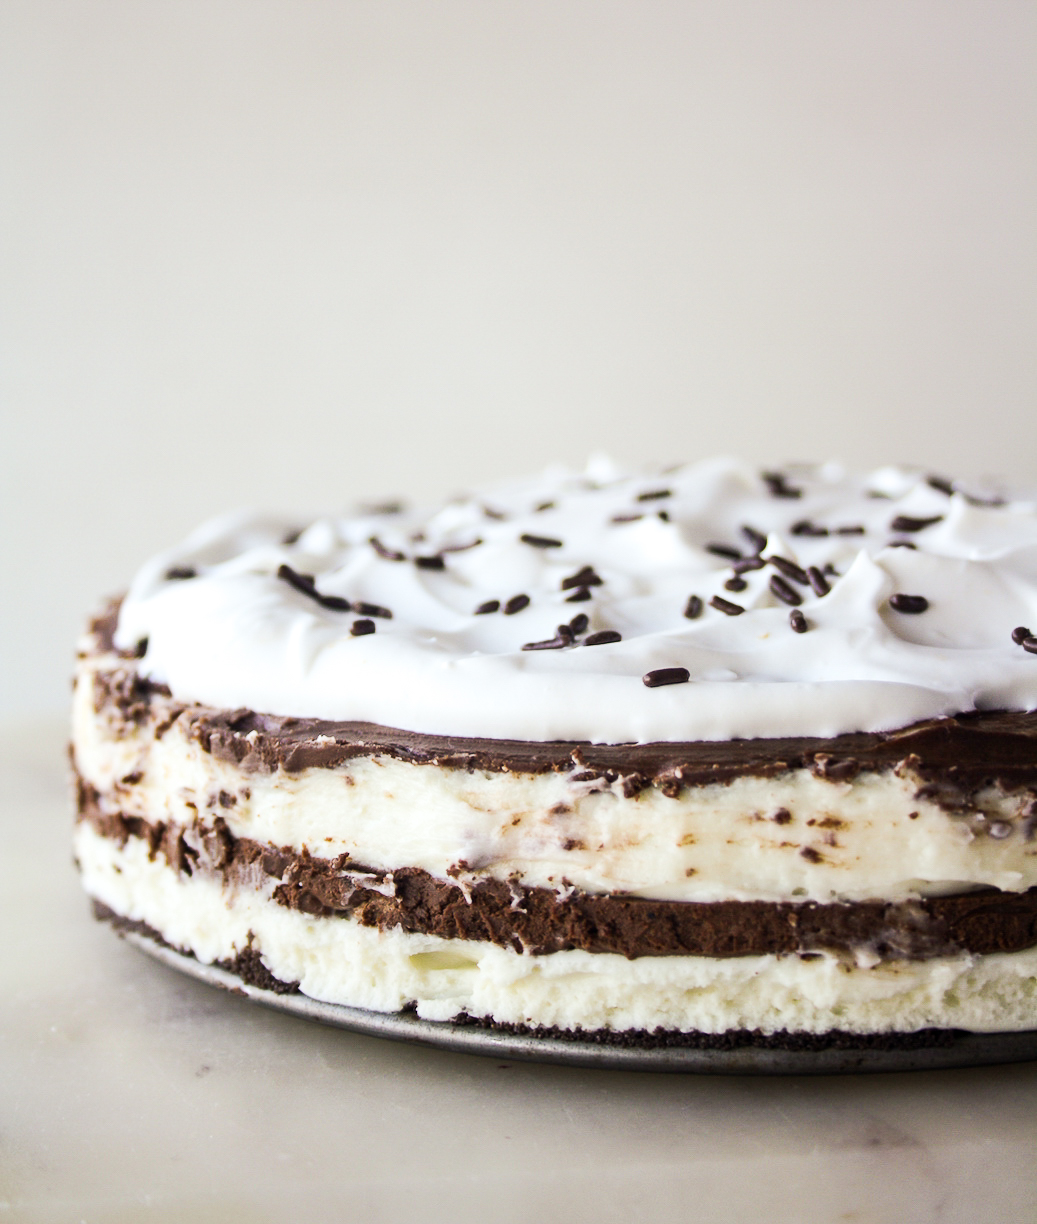
Fluffy whipped cream on top is optional, but it looks pretty and goes so well with the chilled mousse, I highly recommend it. Make this for some sort of celebration if you need to justify it to yourself, but do make it. The biscuit base is just crunchy enough to balance the soft mousse and the combination of white and dark chocolate means there’s no overwhelming sweetness.

I only found it a little hard to judge the evenness of the layers because this is best made in a springform pan, which of course means you can’t see the sides. If it’s easier, just make one big layer of white and one big layer of dark chocolate mousse. Either way, I promise no one will complain.
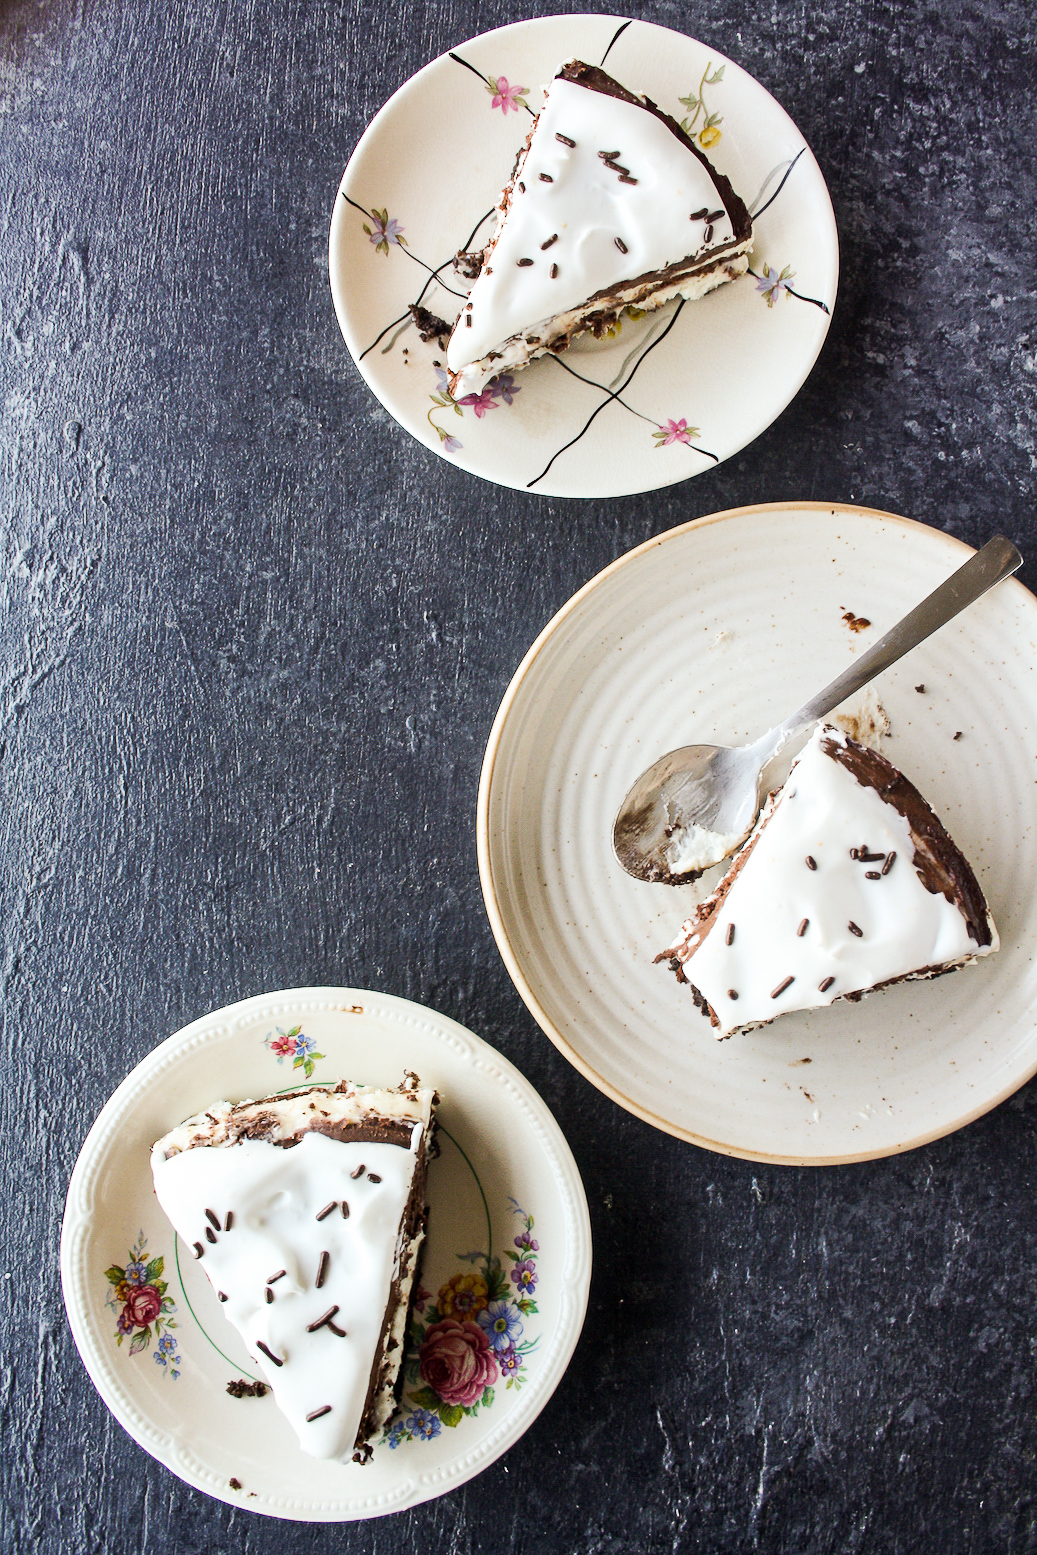
Also, with sprinkles or without? So pretty no matter what you choose!
It comes together quickly once you’ve whipped your cream because it’s just a matter of folding it in with melted chocolate. Use good quality dark chocolate in particular, it does wonders for the flavour. The fridge does all the work, no oven involved. The cake needs to be stored in the fridge at all times, and I think it could even be frozen for a few weeks. I’ll report back!
I hope you’ll try this today!
Please read the recipe notes before beginning.
Double Chocolate Mousse Cake (Eggless, No-Bake)
Ingredients
For the base
- 120 gms Oreos, chocolate flavour recommended
- 4 tbsps melted butter
For the mousse layers
- 200 gms white cooking chocolate, finely chopped
- 200 gms dark cooking chocolate, finely chopped
- 2 tbsps unsalted butter, at room temp
- 3 tbsps caster sugar
- 1 and 1/2 cups chilled whipping cream
- Extra whipped cream and chocolate sprinkles to top, optional
Instructions
- First make the base. Blitz the Oreos in a food processor until they're very finely crumbed, like a powder. Pour in the melted butter and blend once to combine. Press the mixture into the base of an 8" springform tin. Chill for 30 minutes.
- In the meantime, melt the white and dark chocolate in separate bowls, with 1 tbsp butter added to each. You can melt them one at a time in a double boiler or in the microwave. If using a microwave, heat in 10 second increments, stirring in between to melt any lumps, but do not overheat the chocolate. Set both aside at room temperature.
- Now beat the chilled whipping cream till fairly stiff peaks form, with only slightly rounded tops.
- Fold half the whipped cream into the white chocolate. Be gentle as you want the mixture to remain airy. Keep folding until it is smooth and combined. Now spread half of this mixture onto the chilled Oreo base. Place in the fridge and keep the remaining mousse mixture in the fridge too.
- Fold the other half of the whipped cream into the dark chocolate. Begin by just adding a couple of spoons of the cream to help stabilise the chocolate as dark chocolate tends to be thicker and needs to be loosened first. When you've added all the cream, add the 3 tbsps of sugar as well. Fold gently till smooth and combined, then spread half over the chilled white chocolate layer and place in the fridge for 10 minutes. Leave the remaining dark chocolate mousse mixture to chill as well.
- Now spread the other half of the white chocolate mousse onto this dark layer. Chill again for 10 minutes. All this chilling is necessary to make sure the layers don't mix too much.
- Finally, spread the remaining half of the dark chocolate mousse and smoothen the top. If you find that the mousse has thickened a little, let it sit at room temperature for 5 minutes before spreading.
- If this is all confusing, just remember biscuit-white mousse-dark mousse-white mousse-dark mousse. Or make one big layer of white and one big layer of dark and you're done!
- Leave the cake in the fridge for about 4 hours to help it set and firm up. The dark layer will thicken a bit more than the white layer, but the overall effect is light and airy. Top with more whipped cream and chocolate sprinkles if you're feeling decadent! Keep chilled at all times and it should last for about a week in the fridge and a month in the freezer. Happy mousse-ing!
Notes
Shop this recipe!
This post contains affiliate links.
Leave a Reply